USRP X310 Complete Setup Guide: From Unboxing to First Signal (2025 Edition)
Introduction: Setting Up the USRP X310 SDR
The USRP X310 is a powerful software-defined radio (SDR) platform, ideal for applications ranging from wireless communications to radar systems and beyond. With its dual 2x2 MIMO support, a bandwidth of up to 160 MHz, and a frequency range from DC to 6 GHz, it is one of the most versatile SDR platforms available in 2025. This device is fully compatible with GNU Radio, USRP Hardware Driver (UHD), RFNoC, Matlab, and LabVIEW. The UHD and RFNoC frameworks enable flexible DSP, multi-device synchronization, and rapid prototyping, making it an excellent choice for advanced SDR projects. In this comprehensive guide, we’ll walk you through everything from unboxing to transmitting your first signal. Ready to get started? Let’s dive in!
For more details on the USRP X310 SDR, check out our product page here.
1. Unboxing Your USRP X310
Upon receiving your USRP X310, it's essential to handle the device carefully to avoid any damage. Here's how to unbox the device properly:
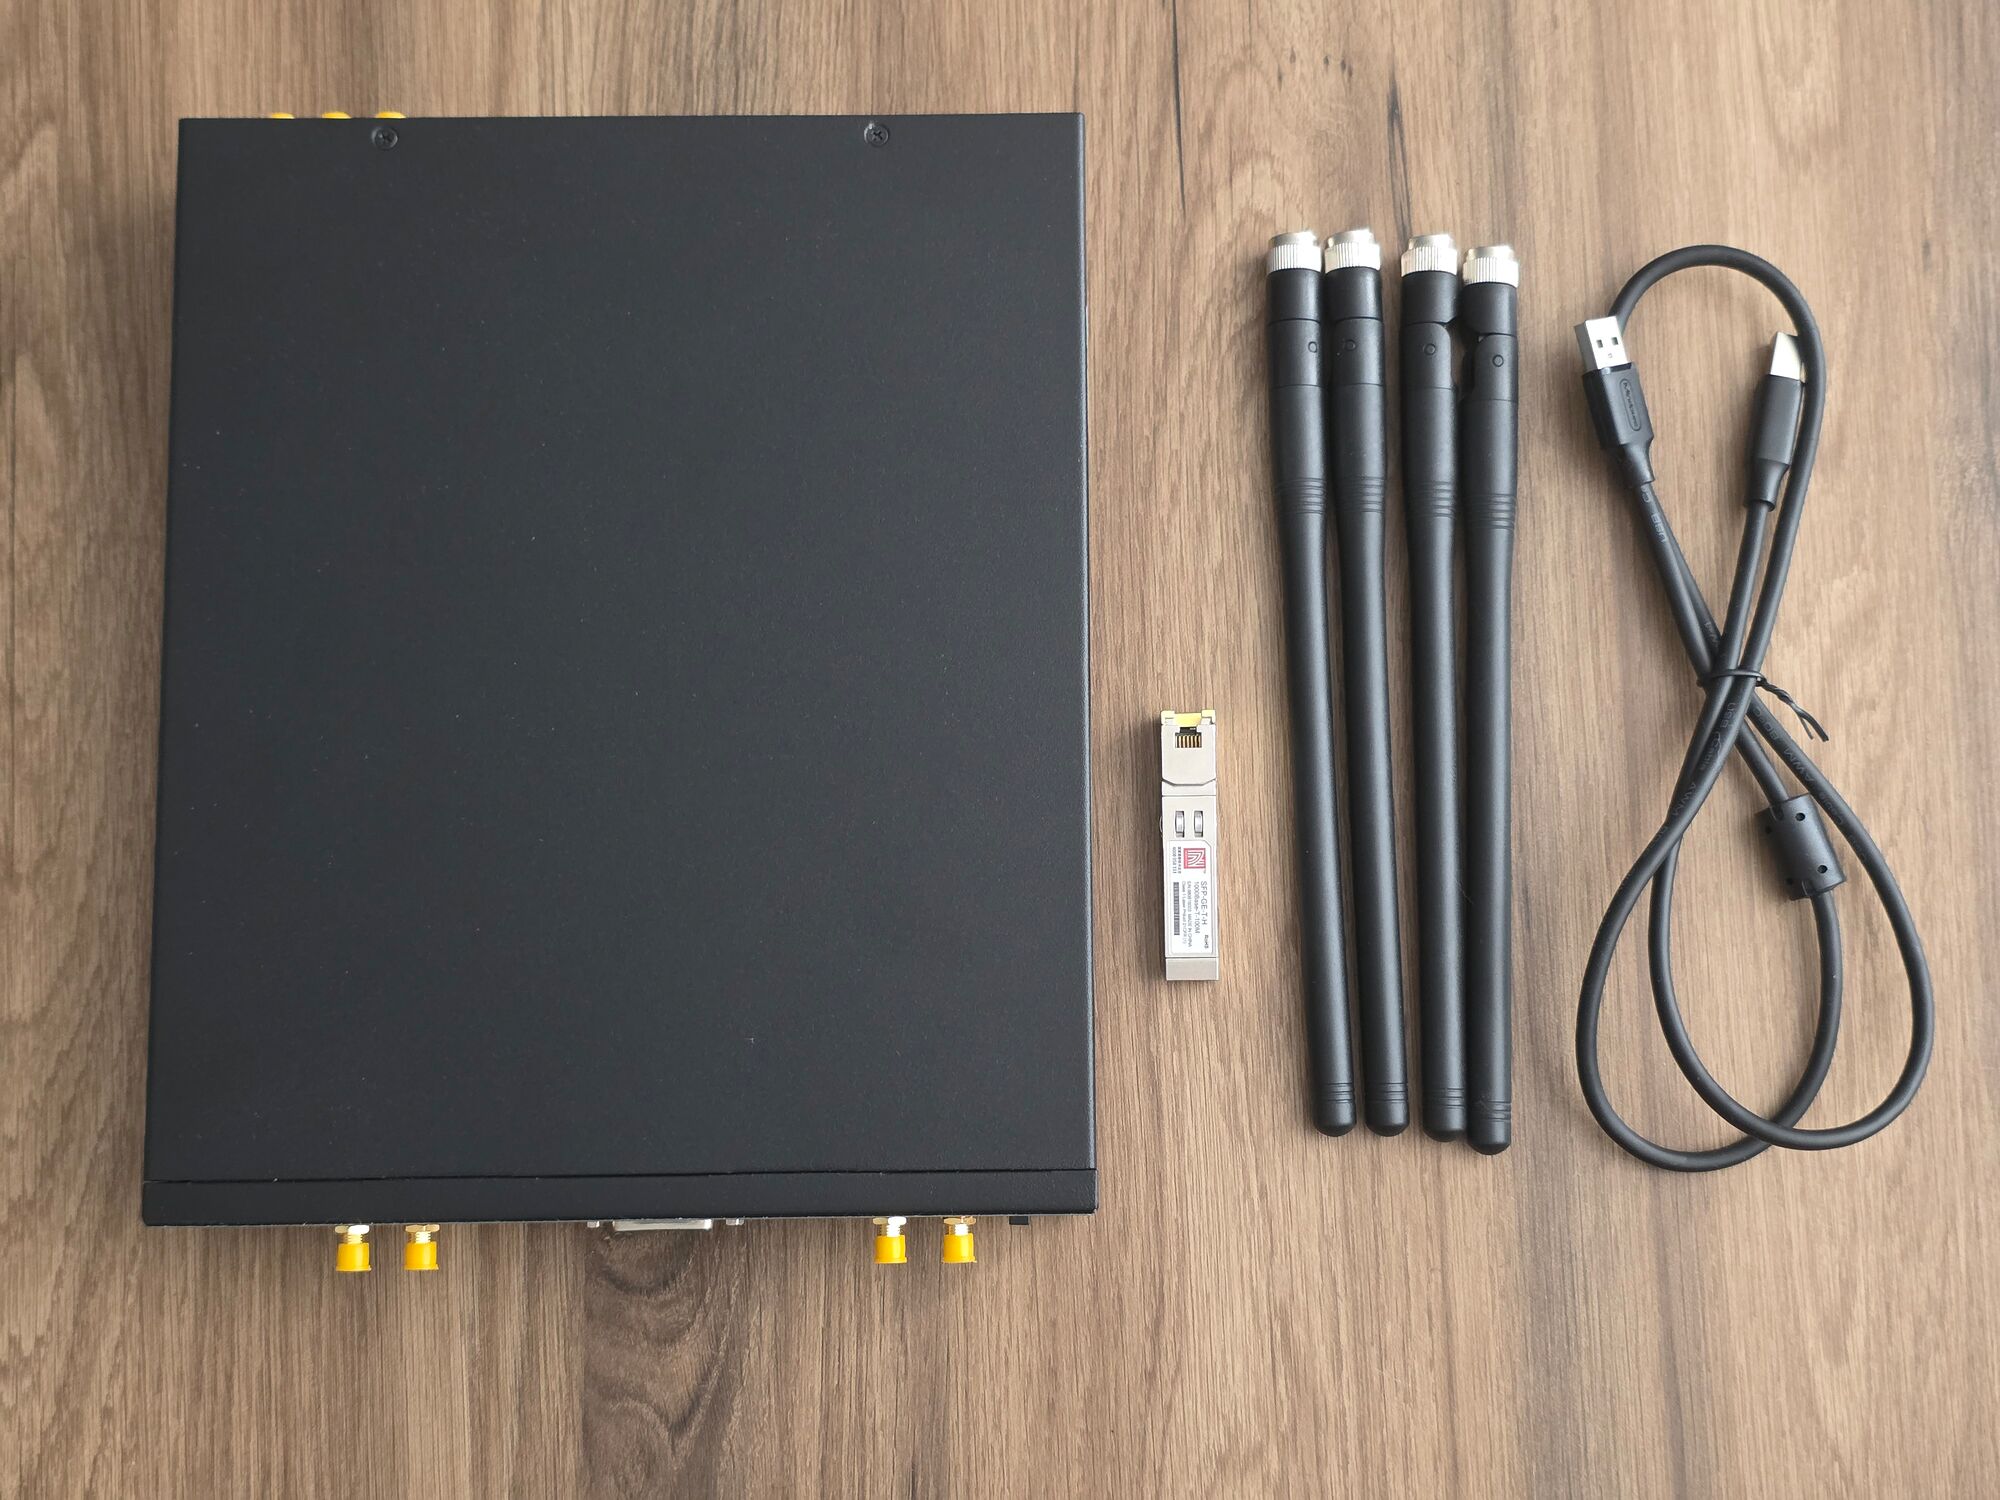
- Step 1: Open the package carefully. Inside, you will find the USRP X310 SDR, the power adapter, antennas, SFP module, and various cables.
- Step 2: Ensure that all components are accounted for, and that there are no visible signs of damage from shipping.
- Step 3: Take a moment to familiarize yourself with the device. The USRP X310 has two high-performance RF front-end connectors for each channel (for MIMO applications), an SFP+ connector for high-speed connectivity, and a large Kintex-7 FPGA for processing.
2. Connecting Power, Antennas, and the SFP Module
Once you have unboxed the USRP X310, the next step is to set it up for operation. Follow these simple steps:
- Power Supply: Plug the power adapter into the USRP X310. The device operates on a wide range of voltages, but it is always a good idea to check the power input specifications to ensure compatibility with your local power grid. Connect the other end to a power outlet. You should see the power indicator light up, indicating that the device is receiving power.
- Antenna Setup: Attach the antennas to the two RF connectors on the front panel of the device. Make sure they are firmly screwed in to ensure a good connection. These antennas will be used to transmit and receive signals during your experiments.
- SFP Module Installation: The USRP X310 comes with an SFP module for high-speed connectivity. This module should be inserted into either the 1G or 10G Ethernet port, depending on your network setup.
- Insert the SFP module into the appropriate port (1G or 10G). Make sure it is firmly seated to ensure a stable connection.
- If you're using the 10G port, you’ll need a 10GbE NIC for the best performance, especially for high-bandwidth applications.
3. Connecting to Your Network or Computer
The USRP X310 needs to be connected to your computer for data transfer and control. Here's how to do it:
- Ethernet Connection: The USRP X310 connects to your computer through an Ethernet port. Use a high-quality Ethernet cable to connect the USRP to a Network Interface Card (NIC) on your computer or to your network switch. The USRP X310 will be assigned an IP address either through DHCP or a static IP, depending on your setup.
- NIC Configuration: You will need to configure your NIC to ensure a stable and fast connection to the USRP. For optimal performance, use a 10GbE (Gigabit Ethernet) NIC if available. This is especially important for high-bandwidth applications, such as wideband signal transmission.
4. Installing UHD (USRP Hardware Driver)
To communicate with the USRP X310, you need the UHD (USRP Hardware Driver) installed on your computer. Here’s how to do it:
- Step 1: Download UHD from the official repository.
- Step 2: Follow the installation instructions for your operating system. UHD supports Linux, Windows, and macOS.
- On Linux, install the required packages using
apt-getoryumdepending on your distribution. - On Windows, you can use the provided installer.
- On macOS, use
brewto install UHD.
- On Linux, install the required packages using
- Once the installation is complete, run the following command to check if your USRP X310 is detected:
uhd_find_devices
If everything is set up correctly, you should see your device listed.
5. Updating the FPGA Version (If Necessary)
The USRP X310 comes with an FPGA (Field-Programmable Gate Array) that controls the signal processing. Occasionally, an FPGA firmware update may be necessary to improve performance or add new features. Here’s how to check and update the FPGA version:
- Step 1: Check the current FPGA version:
This command will provide detailed information about the device, including the FPGA version.uhd_usrp_probe - Step 2: If your FPGA version is outdated, download the latest version from Ettus Research’s official website.
- Step 3: Update the FPGA by following these steps:
- First, ensure that the device is not in use (disconnect any running applications that may be using the USRP).
- Then, run the
uhd_image_loadercommand with the path to the firmware file you downloaded:uhd_image_loader --fpga=/path/to/your/firmware - After the process finishes, reboot your device to apply the new FPGA image.
6. Transmitting Your First Signal
Once everything is connected and the drivers are installed, you can now send your first signal! Here’s a simple way to generate a signal using the USRP X310:
- Step 1: Use the UHD command-line tools or GNU Radio to create a simple signal flow. For instance, use a Signal Source block to generate a sine wave.
- Step 2: Specify the frequency, sample rate, and gain for the signal. Ensure that your antennas are properly oriented for maximum signal output.
- Step 3: Run the flowgraph, and monitor the signal on an SDR receiver or an oscilloscope.
7. Troubleshooting Tips
If you encounter any issues with your USRP X310 during setup, here are some troubleshooting steps:
- Power Issues: Make sure the power adapter is correctly connected and that the device is receiving adequate power.
- Network Configuration: Double-check the IP address settings if you can’t connect to the device. Use
pingto verify connectivity. - Firmware/Software Issues: Ensure that both the FPGA and UHD are up-to-date for optimal performance.
Conclusion
Setting up your USRP X310 is a straightforward process, from unboxing to transmitting your first signal. By following the steps outlined in this guide, you'll be ready to explore the world of software-defined radio and develop exciting new projects.
For a high-performance SDR platform, the USRP X310 is an excellent choice, and we hope this guide has made your setup process smooth and easy. Don’t forget to check out the USRP X310 at SDRstore for more information and purchase options.
Note: You may need to go to your network settings and manually set the IP address to 192.168.10.10 and the netmask to 255.255.255.0 for proper communication between your computer and the device.
We Offer the USRP X310 at the Best Price and Quality!
At SDRstore, we offer the USRP X310 and other USRP products at the lowest prices on the market, ensuring you get the best quality and performance for your SDR projects. Check out our products below:
Nessun messaggio trovato
Scrivi una recensioneWe support all major card and digital payment options. More local methods are available and shown during checkout.
You enter into a binding sales contract once you have received an 'order confirmation and sales receipt' email from us, in line with our Sales & Delivery conditions. Therefore, sdrstore.eu has the right to cancel your order in the event of technical problems, delivery failure, Fair use policy and other similar situations.
Your payments are protected by advanced encryption and 3-D Secure authentication for safe online shopping.