Meshtastic Setup Guide for Beginners: LoRa Regions, Channels, Antennas, Range, and First Message
Updated: June 2026. This Meshtastic setup guide covers current LoRa regions, firmware installation, channels, antennas, range optimization, and the first-message workflow for beginners.
Meshtastic is an open-source off-grid communication system built around LoRa radio devices. It allows compatible nodes to exchange text messages, relay packets through a mesh, and optionally share location data without relying on mobile coverage or internet access.
A basic Meshtastic setup is straightforward: choose two compatible nodes, attach the correct antennas, install Meshtastic firmware if needed, select the right LoRa region, connect the radios to your phones, and send your first message.
However, small setup mistakes can prevent communication or reduce range dramatically. A node will not transmit until a region is selected. Devices using different modem presets may not communicate. A poor antenna can limit range even when the radio board is working correctly. Changing advanced settings too early can also make troubleshooting harder.
This beginner guide explains Meshtastic setup step by step, including LoRa regions, firmware flashing, Bluetooth pairing, messaging channels, antennas, range, node roles, privacy settings, MQTT, and common fixes.
To compare hardware first, read our guide: Best Meshtastic Devices in 2026: Handhelds, Trackers, and Base Stations Compared.
Quick Answer: How Do You Set Up Meshtastic?
The safest beginner workflow is:
- Buy at least two Meshtastic-compatible nodes intended for the correct frequency range in your region.
- Attach suitable LoRa antennas before powering the radios.
- Install or update Meshtastic firmware if required.
- Install the official Meshtastic app on your phone.
- Connect the first node using Bluetooth, USB, Wi-Fi, or Ethernet depending on the device.
- Set the correct LoRa region before transmitting.
- Leave the modem preset on
LONG_FAST. - Keep the default hop limit at
3. - Repeat the same setup on the second node.
- Send a local test message.
- Test outdoor range before changing advanced settings.
Start with the defaults. Once your first messages work reliably, you can improve antennas, add a private channel, install a fixed relay node, or experiment with more advanced features.
What Is Meshtastic?
Meshtastic uses LoRa radios to create a decentralized mesh network. LoRa is designed for long-range, low-data-rate wireless communication. It is suitable for text messages, position updates, and small telemetry packets rather than high-speed internet access.
Each node can communicate directly with nearby compatible radios. Nodes can also relay packets across the mesh, allowing a message to travel farther when useful relay nodes are available.
Many Meshtastic devices connect to a phone over Bluetooth. The phone provides the messaging interface, while the LoRa radio handles off-grid communication. Some handheld devices also include their own display, buttons, keyboard, or GPS module.
Meshtastic is useful for:
- Hiking and outdoor group communication
- Camping and overlanding
- Emergency-preparedness networks
- Community off-grid messaging
- Remote property monitoring
- GPS position sharing
- Solar-powered relay nodes
- IoT sensor projects
- Events with unreliable cellular coverage
- Learning about LoRa and mesh networking
What Do You Need for Your First Meshtastic Setup?
You need at least two nodes to test off-grid communication properly. One node can be configured, but it cannot prove that the LoRa link works.
| Item | Why You Need It | Beginner Recommendation |
|---|---|---|
| Two compatible Meshtastic nodes | You need one sender and one receiver | Start with matching frequency variants |
| Correct LoRa antennas | The antennas must suit the operating frequency | Use 868 MHz antennas for EU_868 or 915 MHz antennas for US networks |
| USB data cable | Used for firmware flashing and charging | Use a known-good data cable, not a charging-only cable |
| Phone or computer | Used for configuration and messaging | Use the Android or iOS app for the easiest start |
| Meshtastic firmware | Runs the mesh-radio software | Use the current stable release for your first setup |
| Meshtastic client app | Provides messaging, configuration, and node information | Install the official mobile app |
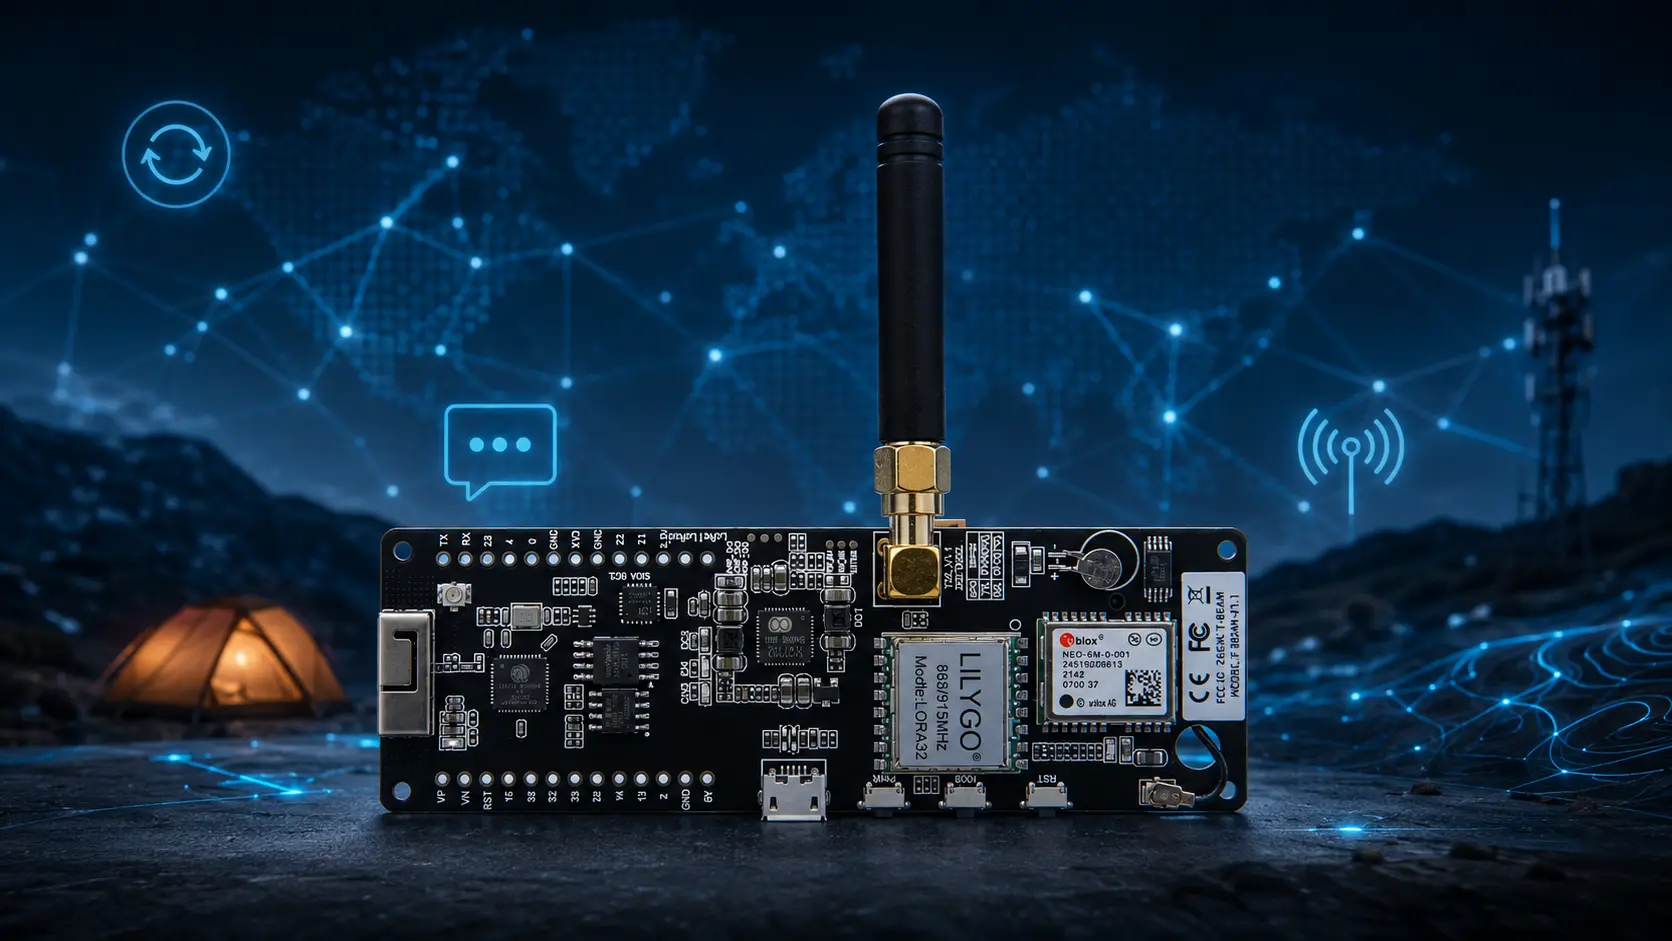
Choose the Right Meshtastic Hardware
The right node depends on whether you want a ready-to-use handheld, a GPS-enabled DIY board, or a low-power base station.
| Hardware Type | Best For | Buyer Advice |
|---|---|---|
| LILYGO T-Deck family | Handheld communicator projects with a display and keyboard | Best when you want a more interactive portable device |
| LILYGO T-Beam Supreme | GPS-enabled DIY node with ESP32-S3 and SX1262 | Strong flexible option for modern beginner projects |
| LILYGO T-Beam V1.2 | Budget GPS projects and existing T-Beam setups | Useful lower-cost learning board |
| Heltec LoRa32 V4 | Low-cost DIY experimentation | Good for users comfortable adding a case and battery |
| RAK WisBlock | Low-power nodes, solar relays, and modular base stations | Best when battery efficiency and expansion matter |
| SenseCAP T1000-E | Compact GPS tracking | Best when you want a ready-to-go tracker |
SDRstore.eu offers several LILYGO boards for Meshtastic and LoRa projects:
- LILYGO T-Deck ESP32-S3 LoRa handheld development board
- LILYGO Meshtastic T-Beam Supreme
- LILYGO Meshtastic T-Beam V1.2
- LILYGO boards, modules, and accessories
Step 1: Choose the Correct LoRa Region
Choosing the correct LoRa region is the most important Meshtastic setup step. A new device will not transmit while its region remains unset.
The region controls the frequency range, regulatory limits, and radio behavior. It must match your location and should suit the hardware variant and antenna you purchased.
| Region Code | Location | Frequency Range | Common Hardware Choice |
|---|---|---|---|
| US | United States | 902–928 MHz | 915 MHz-compatible radio and antenna |
| EU_868 | European Union 868 MHz band | 869.4–869.65 MHz | 868 MHz radio variant and matching antenna |
| EU_433 | European Union 433 MHz band | 433–434 MHz | 433 MHz radio variant and matching antenna |
| ANZ | Australia and New Zealand | 915–928 MHz | 915 MHz-compatible radio and antenna |
| IN | India | 865–867 MHz | 865 MHz-compatible antenna and suitable radio |
| JP | Japan | 920.8–927.8 MHz | 920 MHz-compatible hardware |
| LORA_24 | 2.4 GHz LoRa region | 2400–2483.5 MHz | Dedicated 2.4 GHz LoRa hardware and antenna |
This table covers common regions only. Always review the current region list and local regulations before transmitting.
Which Meshtastic frequency should you buy in Europe?
For most European Union users, an 868 MHz product variant configured with EU_868 is the normal choice. A 433 MHz option may also be available for specific projects, but the radio variant, antenna, and software region must match.
Which Meshtastic frequency should you buy in the United States?
United States users should normally choose a 915 MHz-compatible device and select the US region.
Can EU_868 and US Meshtastic nodes communicate?
Not in a normal setup. Nodes intended to communicate with each other need compatible frequency hardware, matching regional configuration, and matching modem settings.
Step 2: Attach the Antenna Before Powering the Radio
Attach a suitable antenna before powering or transmitting with your LoRa radio. Do not intentionally operate the transmitter without an antenna.
A poor or mismatched antenna can reduce range dramatically. It may also reflect RF energy back toward the radio stage.
Meshtastic antenna checklist
- Use an antenna designed for your regional frequency.
- Confirm whether the connector is SMA, RP-SMA, U.FL, or another type.
- Do not force connectors together.
- Do not assume 868 MHz and 915 MHz antennas are identical.
- Attach the antenna before transmitting.
- Use a vertical antenna orientation for many normal portable and base-station installations.
For important installations, test antenna performance with a vector network analyzer. Read our guide: NanoVNA Setup Guide: Calibration, SWR, Smith Chart, and Antenna Testing.
Step 3: Flash Meshtastic Firmware
Some ready-to-use devices arrive with Meshtastic firmware installed. Development boards may require flashing or updating before first use.
ESP32 and ESP32-S3 devices
The official browser-based Meshtastic Web Flasher is normally the easiest installation method for compatible ESP32 devices.
- Attach the correct antenna.
- Connect the device to your computer using a USB data cable.
- Open Meshtastic Web Flasher in Chrome or Edge.
- Select the exact board model.
- Select a stable firmware release.
- Follow the flashing instructions.
- Wait for the process to complete before disconnecting the node.
Some ESP32-S3 boards may need to be placed into firmware-download mode manually. Follow the board-specific instructions if the Web Flasher cannot connect automatically.
nRF52, RP2040, and RP2350 devices
Many nRF52, RP2040, and RP2350 devices use a drag-and-drop firmware process through a UF2 bootloader.
- Download the correct firmware file for your exact device.
- Connect the radio with a USB data cable.
- Enter bootloader mode according to the device instructions.
- Copy the firmware file to the mounted drive.
- Wait for the node to reboot.
Firmware mistakes to avoid
- Do not flash firmware for a different board.
- Do not unplug the node while flashing.
- Use a proper USB data cable.
- Start with stable firmware unless you need an experimental feature.
- Back up important channel settings before major updates.
Step 4: Install the Meshtastic App
The mobile app is the easiest way to configure a node and exchange messages. Install the official Meshtastic app on Android or iOS.
More advanced users can also use the web client or Python command-line interface.
| Connection Method | Best For | Important Note |
|---|---|---|
| Bluetooth | Portable nodes and phone-based setups | Easiest first connection method |
| USB | Configuration, firmware, and troubleshooting | Use a data cable and USB OTG adapter when connecting to a phone |
| Wi-Fi or Ethernet | Supported nodes, gateways, and fixed base stations | Useful for home installations and browser-based access |
Step 5: Connect Your First Radio
Bluetooth is normally the fastest beginner option.
- Turn on the first Meshtastic radio.
- Open the Meshtastic app.
- Open the Connection tab.
- Select Bluetooth.
- Choose your device from the discovered-node list.
- Enter the pairing PIN when requested.
- Wait for the radio information to load.
Devices with a display normally show the Bluetooth pairing PIN on screen. Headless devices commonly use the default PIN 123456 unless it has been changed.
Step 6: Set the LoRa Region
After connecting the radio, select your LoRa region. This is required before transmission.
- Open Settings.
- Select LoRa.
- Open the Region dropdown.
- Select the correct region for your location.
- Save the setting.
- Wait for the device to restart if required.
Examples:
- Select
EU_868for a normal European Union 868 MHz setup. - Select
USfor a normal United States 915 MHz setup. - Select
ANZfor Australia and New Zealand 915 MHz networks.
Step 7: Set a Clear Node Name
Give your node a recognizable identity. This helps you identify devices in the Nodes list.
- Open Settings.
- Select User.
- Set a Long Name.
- Set a Short Name.
- Save the settings.
Use a short name that makes sense for the project, such as a team label, callsign, location, or device role. Avoid sharing sensitive personal details on public channels.
Step 8: Keep the Modem Preset on LONG_FAST
The default modem preset is LONG_FAST. It is the safest starting point because it balances range, airtime, and message speed.
Beginners should avoid changing modem settings until the first local and outdoor tests work correctly.
| Preset | General Purpose | Beginner Advice |
|---|---|---|
| SHORT_TURBO | Faster communication with shorter range and higher bandwidth | Not the normal beginner choice and not suitable for every region |
| SHORT_FAST | Lower airtime and shorter-range networks | Use only when coordinating intentionally |
| MEDIUM_FAST | Middle-ground network configuration | Useful for controlled local meshes |
| LONG_FAST | Balanced speed and range | Best starting point for most users |
| LONG_SLOW | Longer-range focus with slower messages | Change only when matching an existing network |
| VERY_LONG_SLOW | Maximum-range focus with high airtime | Not the default choice for normal mesh use |
Nodes need matching region and modem configuration to communicate fully.
Step 9: Keep the Default Hop Limit at 3
The default hop limit is 3. This is suitable for most beginner networks.
Increasing the hop limit does not automatically fix poor coverage. Higher values can increase traffic and reduce efficiency in a busy mesh.
Hop-limit advice
- Keep the default value of
3. - Do not increase it only because one message failed.
- Improve antenna placement and relay location first.
- Change hop behavior only after understanding your local mesh layout.
Step 10: Configure the Second Node
Repeat the same process on the second device:
- Attach the correct antenna.
- Install firmware if needed.
- Connect to the node.
- Select the same region.
- Keep
LONG_FAST. - Keep the hop limit at
3. - Set a different node name.
- Keep the default primary channel for your first test.
Place the nodes a short distance apart at first. Confirm that the basic setup works before testing several kilometers away.
Step 11: Send Your First Meshtastic Message
Once both nodes have matching settings, send a local test message.
- Open the Conversations tab.
- Select the primary channel.
- Type a short message such as
Test from node 1. - Send the message.
- Check whether the second node receives it.
- Reply from the second device.
After a successful indoor or garden test, move the radios farther apart and begin measuring realistic outdoor range.
Meshtastic Channels Explained
The word channel can be confusing in Meshtastic because it can refer to two different concepts:
- A messaging channel used for conversations and encryption.
- A physical LoRa frequency slot used by the radio.
Messaging channels
Meshtastic supports one primary messaging channel and up to seven secondary channels.
| Channel Index | Role | Purpose |
|---|---|---|
| 0 | Primary | Main channel used for regular messages and periodic broadcasts by default |
| 1–7 | Secondary | Optional private groups, team conversations, and special-purpose channels |
LoRa frequency slots
A frequency slot controls the actual radio frequency used inside the selected regional band. It is not the same as a chat group.
Beginners should normally leave the frequency slot unchanged. Adjust it only when coordinating with an existing local mesh or when you understand the reason for the change.
Is the Default Meshtastic Channel Private?
No. The default primary channel is intended to make initial communication easy. Its default encryption key is publicly known, so it should not be treated as a private conversation space.
Use the default channel for basic testing and public mesh discovery. Create a private secondary channel with a custom PSK for trusted group communication.
How to Create a Private Meshtastic Channel
A private secondary channel is useful for a family, hiking group, event team, or controlled project.
- Open Settings.
- Select Channels.
- Add or edit a secondary channel.
- Choose a short channel name.
- Generate or set a custom PSK.
- Save the configuration.
- Generate a QR code or channel URL.
- Import the same configuration on the other trusted devices.
Treat QR codes and channel links like passwords. Anyone who receives the configuration may be able to join the channel.
Should You Replace the Default Primary Channel?
Beginners should normally keep the default primary channel during initial testing and add a private secondary channel separately.
Changing the primary channel can also affect frequency-slot behavior when the slot is left unset. This can cause confusion when nearby nodes appear to use similar settings but no longer communicate.
Safe beginner channel setup
- Keep the default primary channel for discovery and first tests.
- Add a private secondary channel for your group.
- Share the secondary channel using a trusted QR code or URL.
- Review the imported configuration before accepting shared settings.
How to Improve Meshtastic Range
Real-world range depends on much more than the radio board. Antenna quality, antenna height, terrain, buildings, trees, regional regulations, modem settings, interference, and relay placement all matter.
A correctly placed outdoor node can outperform a more expensive device hidden inside a reinforced-concrete building or at the bottom of a backpack.
Range improvements that matter most
- Use an antenna tuned for your region.
- Install the antenna vertically for normal omni-directional use.
- Place fixed nodes higher.
- Improve line of sight.
- Keep antennas away from large metal objects.
- Do not hide portable nodes under equipment.
- Use short, low-loss antenna cables.
- Test antennas instead of trusting unrealistic gain claims.
- Add a carefully positioned relay node when needed.
- Keep the configuration simple during troubleshooting.
How Much Range Should You Expect?
There is no guaranteed Meshtastic range. The same radio can behave very differently depending on terrain and placement.
| Environment | Main Challenge | Best Improvement |
|---|---|---|
| Inside buildings | Walls, reinforced concrete, and electrical noise | Move the node near a window or add an outdoor relay |
| City streets | Buildings, reflections, interference, and low antenna height | Use elevated fixed nodes |
| Forests | Trees and terrain obstruct the radio path | Increase elevation and reduce unrealistic spacing |
| Open countryside | Long distances and limited relay locations | Use high antenna placement and suitable outdoor antennas |
| Hilltop links | Safe installation and clear line of sight | Use reliable elevated relay nodes |
Should You Buy a High-Gain Antenna?
A better antenna can improve range, but antenna claims should be treated carefully.
A large outdoor omni-directional antenna may improve a fixed base station. A compact whip may be more practical for a handheld. A directional antenna can improve a point-to-point link but must be aimed correctly.
Choose the antenna based on the project:
- Use a compact whip for portable nodes.
- Use a tuned outdoor omni-directional antenna for a fixed relay.
- Use a directional antenna only for intentional point-to-point links.
- Keep feedline losses low.
- Measure antennas with a NanoVNA when the installation matters.
Client, Router, and Repeater Roles Explained
Most portable nodes should remain on the normal Client role.
Do not set every device as a router or repeater. Relay-focused roles should be reserved for fixed, carefully positioned nodes with reliable power and useful elevation.
| Device Type | Recommended Starting Role |
|---|---|
| Portable handheld | Client |
| GPS tracker | Client |
| Phone-connected everyday node | Client |
| Carefully positioned fixed relay | Choose an appropriate relay-focused role after testing |
| Solar-powered permanent installation | Select the role based on the network design and location |
A router hidden inside a backpack or building is not automatically useful. Placement matters more than assigning an advanced label.
How to Test Meshtastic Range
Meshtastic includes a Range Test module for measuring communication distance between nodes.
One fixed sender transmits sequential packets while a mobile receiver logs which packets arrive. GPS information can help identify coverage gaps.
Range-test workflow
- Enable the Range Test module on both radios.
- Use one fixed node as the sender.
- Carry or move the receiver through the area you want to test.
- Save received packet information.
- Review successful locations and gaps.
- Disable the Range Test module after the test.
Do not leave automatic test packets enabled permanently. Unnecessary traffic consumes airtime and can reduce mesh performance.
GPS and Location Sharing
Some Meshtastic devices include GPS or GNSS hardware. Other devices can use a phone location or a manually configured fixed position.
Location sharing is useful for hiking groups, tracking, coverage testing, and outdoor coordination. It can also reveal sensitive information if configured carelessly.
Privacy advice
- Do not publish your exact home location unnecessarily.
- Review position precision settings.
- Consider disabling precise location broadcasts on public channels.
- Use a private secondary channel for trusted location sharing.
- Review MQTT settings before connecting a node to internet gateways.
Do You Need MQTT?
MQTT is optional. It can connect Meshtastic traffic to internet services when a compatible gateway is configured, but it is not required for normal off-grid communication.
Use MQTT when:
- You intentionally want an internet-connected bridge.
- You understand what data may be forwarded.
- You are building a controlled gateway project.
- You want to connect separate local meshes intentionally.
Avoid enabling MQTT blindly when:
- You want a purely off-grid mesh.
- You do not understand location-sharing implications.
- You are testing a private family or team channel.
- You are still troubleshooting basic LoRa range.
Common Meshtastic Setup Problems and Fixes
The device does not transmit
Check the LoRa region. A new node will not transmit while the region remains unset.
Two nodes cannot communicate
Confirm that both nodes use compatible radio hardware, the same region, matching modem presets, matching channel settings, and suitable antennas.
Bluetooth pairing fails
Restart the node and phone, remove any old Bluetooth pairing, and reconnect through the Meshtastic app. Headless devices commonly use the PIN 123456 unless it has been changed.
The device does not appear in the Web Flasher
Use Chrome or Edge, try another USB port, and replace the cable with a known-good USB data cable. Some USB cables provide power but cannot transfer data.
Range is much shorter than expected
Check the antenna frequency, connector type, antenna placement, terrain, and whether the node is hidden inside a building or backpack. Improve antenna position before changing advanced settings.
The device stops transmitting in Europe
European regions apply duty-cycle limitations. Do not override regulatory limits unless you fully understand the rules and legal implications.
Private-channel messages do not arrive
Confirm that every trusted device imported the same private-channel configuration. Reshare the QR code or URL if needed.
The antenna connector does not fit
Check whether the radio and antenna use SMA, RP-SMA, U.FL, or another connector. Do not overtighten or force incompatible connectors together.
Best Beginner Meshtastic Setup Checklist
- Buy two compatible nodes for your region.
- Attach suitable antennas before powering the radios.
- Install stable Meshtastic firmware if required.
- Install the official mobile app.
- Connect node 1 over Bluetooth.
- Set the correct region.
- Set a clear node name.
- Leave the modem preset on
LONG_FAST. - Leave the hop limit at
3. - Configure node 2 with matching settings.
- Send a local test message.
- Reply from the second node.
- Test range outdoors.
- Add a private secondary channel for your group.
- Improve antenna placement before changing advanced settings.
Where to Browse Meshtastic-Compatible Hardware
- LILYGO T-Deck ESP32-S3 LoRa handheld development board
- LILYGO Meshtastic T-Beam Supreme
- LILYGO Meshtastic T-Beam V1.2
- LILYGO boards, modules, and accessories
- Antennas and RF accessories
Final Recommendation
A beginner Meshtastic setup should remain simple. Buy two compatible nodes for your region, attach the correct antennas, install stable firmware if needed, set the region, keep LONG_FAST, leave the hop limit at 3, and send a local test message.
Once the first messages work, improve range through better antenna placement, additional height, clear line of sight, and carefully selected relay locations. Do not begin by changing every advanced option.
For most European users, an 868 MHz device configured with EU_868 is the normal starting point. For United States users, choose a 915 MHz-compatible device and the US region.
The key rule is simple: match the hardware, antenna, software region, modem preset, and channel configuration across your nodes. Once those basics are correct, Meshtastic becomes much easier to use.
FAQ
What is Meshtastic?
Meshtastic is an open-source off-grid communication system that uses LoRa radios to exchange text messages, position data, and small telemetry packets without cellular coverage or internet access.
How many Meshtastic devices do I need?
You need at least two compatible nodes to test off-grid messaging. Additional nodes can improve coverage when placed carefully.
Which Meshtastic frequency should I buy in Europe?
Most European Union users should choose an 868 MHz device and select the EU_868 region. Use a matching 868 MHz antenna.
Which Meshtastic frequency should I buy in the United States?
United States users should normally choose a 915 MHz-compatible radio and select the US region.
Can EU_868 and US Meshtastic nodes communicate?
Not in a normal setup. The radios need compatible hardware frequencies, matching regions, matching modem presets, and matching channel settings.
What Meshtastic modem preset should beginners use?
Beginners should normally use LONG_FAST. It is the default modem preset and balances range with message speed.
What hop limit should I use for Meshtastic?
Keep the default hop limit of 3 unless you understand your mesh layout and have a clear reason to change it.
Do I need internet for Meshtastic?
No. Meshtastic can exchange messages over LoRa without internet access or cellular service. Internet connectivity is optional for features such as MQTT.
Do I need a phone for Meshtastic?
Many nodes use a phone app as the main interface through Bluetooth. Some handheld devices include their own display, controls, or keyboard for more standalone use.
Is the default Meshtastic channel private?
No. The default primary channel uses a publicly known key and should not be treated as private. Create a secondary channel with a custom PSK for trusted group communication.
How do I create a private Meshtastic channel?
Add a secondary channel, choose a name, generate a custom PSK, and share the channel configuration with trusted users through a QR code or URL.
Why are my Meshtastic nodes not communicating?
Check that both radios use compatible hardware, the same LoRa region, matching modem presets, matching channel configuration, and suitable antennas.
What antenna should I use for Meshtastic?
Use an antenna tuned for your regional frequency, such as 868 MHz for EU_868 or 915 MHz for a United States setup. Confirm the connector type before installation.
Should every Meshtastic node be configured as a router?
No. Most portable nodes should remain on the Client role. Use relay-focused roles only for carefully positioned fixed nodes with reliable power and a clear purpose.
How can I improve Meshtastic range?
Use a properly tuned antenna, increase antenna height, improve line of sight, move fixed nodes outdoors, keep cable losses low, and add carefully positioned relay nodes.
Can I use MQTT with Meshtastic?
Yes, but MQTT is optional. It can bridge traffic through internet-connected gateways, so review privacy and location-sharing settings before enabling it.
No posts found
Write a review
We support all major card and digital payment options. More local methods are available and shown during checkout.
You enter into a binding sales contract once you have received an 'order confirmation and sales receipt' email from us, in line with our Sales & Delivery conditions. Therefore, sdrstore.eu has the right to cancel your order in the event of technical problems, delivery failure, Fair use policy and other similar situations.
Your payments are protected by advanced encryption and 3-D Secure authentication for safe online shopping.