





bladeRF Not Detected? Fix USB 3.0, Firmware, FPGA Image, and libbladeRF Issues
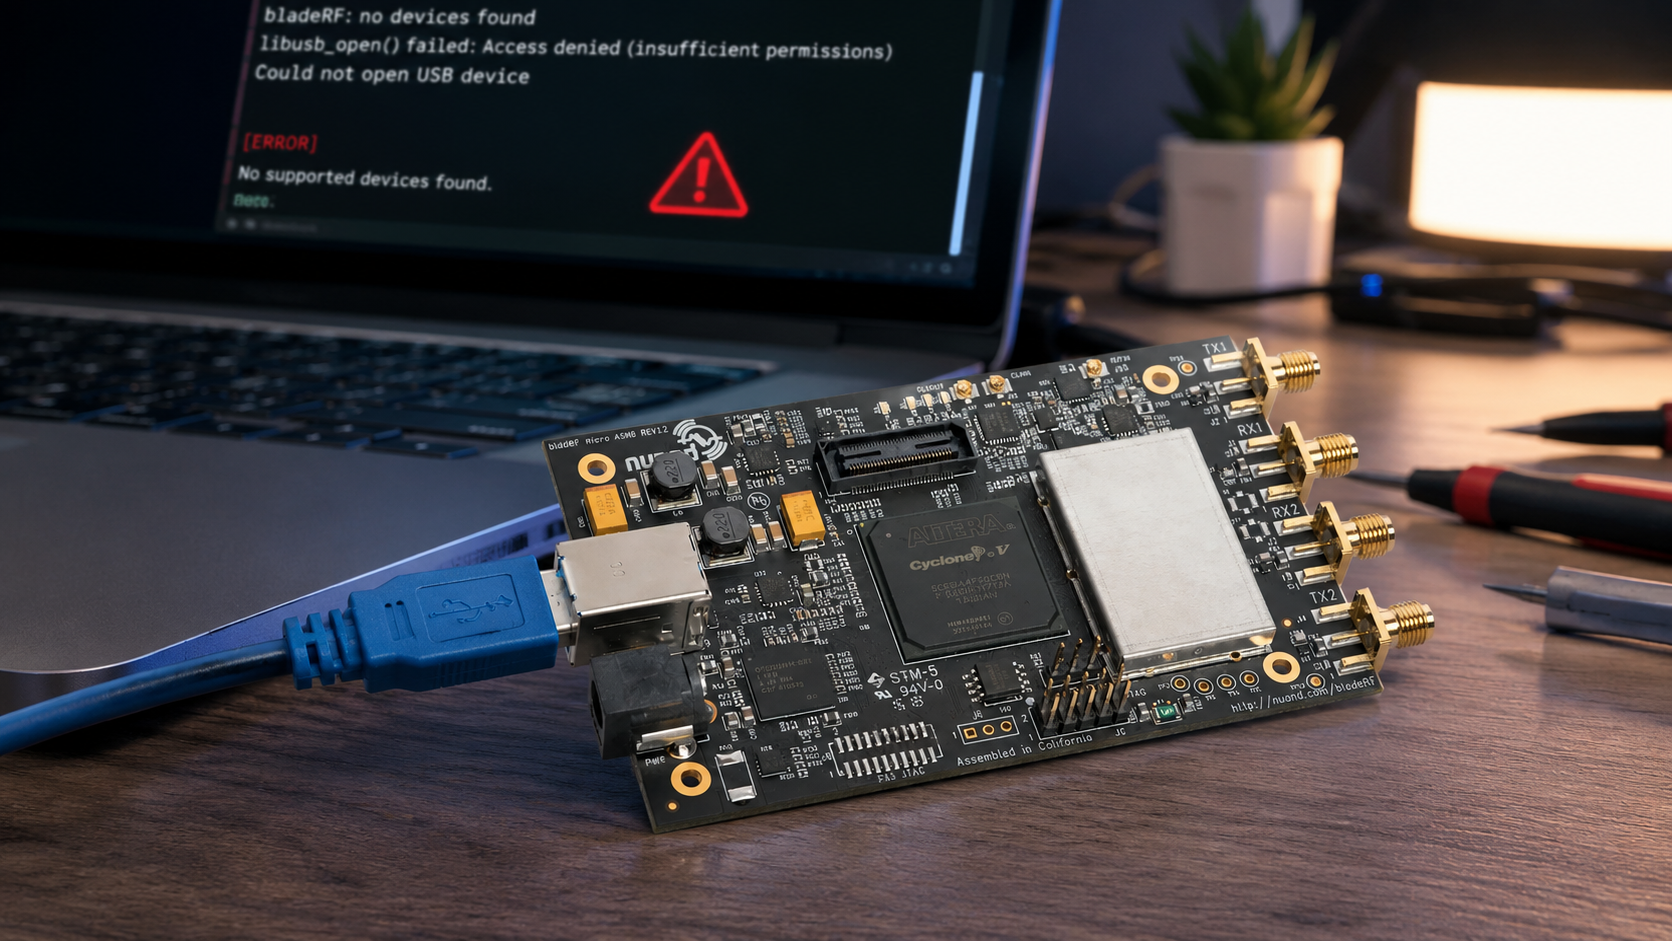
If your bladeRF 2.0 micro is not detected, the problem is usually in one of four places: the USB connection, the operating-system driver or permissions, the libbladeRF installation, or the FPGA image. GNU Radio problems are often a separate layer, so you should not start by debugging GNU Radio until bladeRF-cli can see the board.
This troubleshooting guide explains how to fix common bladeRF detection problems on Windows, Linux, and macOS. It covers USB 3.0 checks, bladeRF-cli commands, firmware warnings, FPGA image loading, xA4 vs xA9 image mistakes, Linux udev rules, Windows drivers, libbladeRF errors, and GNU Radio device issues.
Browse the bladeRF SDR devices and accessories category, the bladeRF 2.0 micro xA4, and the bladeRF 2.0 micro xA9.
Quick Fix: bladeRF Not Detected Checklist
| Symptom | Most likely cause | First fix to try |
|---|---|---|
bladeRF-cli -p shows no device |
USB cable, USB port, driver, permissions, or hardware enumeration issue | Try a direct USB 3.0 port, another USB 3.0 cable, and check OS-level detection. |
Device appears only with sudo on Linux |
udev rule or user group issue | Install udev rules and ensure the user is in the correct group. |
FPGA loaded: no |
FPGA image not installed or not loaded | Install or manually load the correct xA4 or xA9 FPGA image. |
| Wrong xA4 or xA9 behavior | Wrong FPGA image | Check FPGA size and use the matching hosted image. |
| Windows sees an unknown USB device | Missing or incorrect driver | Install the official Nuand Windows installer. |
| GNU Radio cannot open bladeRF | GNU Radio module issue or another program already opened the device | Close other SDR programs and verify bladeRF-cli before debugging GNU Radio. |
| Streaming drops, timeouts, or unreliable operation | USB throughput, host performance, cable, hub, or sample-rate issue | Reduce sample rate and use a direct USB 3.0 port. |
Step 1: Confirm the USB Connection First
Many bladeRF problems are simple USB issues. Start here before reinstalling drivers or flashing firmware.
Check the basics
- Use a direct USB 3.0 port on the computer.
- Avoid unpowered hubs, front-panel ports, docking stations, and long extension cables during troubleshooting.
- Try another known-good USB 3.0 cable.
- Disconnect other high-bandwidth USB devices temporarily.
- Use a stable host PC or laptop rather than a low-power virtualized environment.
- If the board is intermittently detected, test with another computer before assuming the SDR is faulty.
Why USB 3.0 matters
bladeRF 2.0 micro is designed for USB 3.0 SuperSpeed operation. It may enumerate through slower or problematic USB paths, but high-rate SDR streaming can become unreliable if the host controller, cable, or port is weak.
Step 2: Check Whether the Operating System Sees the Device
Before using GNU Radio, confirm whether the operating system can see the bladeRF at all.
Linux check
lsusbIf the device appears in lsusb but not in bladeRF-cli, the problem is likely permissions, libbladeRF, or driver/library setup. If the device does not appear in lsusb, return to the USB cable, port, hub, and power checks.
Windows check
Open Device Manager and look for the bladeRF device or an unknown USB device. If Windows sees unknown hardware, reinstall the official Nuand Windows installer rather than mixing old manual drivers.
macOS check
Use System Information or terminal USB tools to confirm whether the device is visible. If macOS can see the USB device but bladeRF-cli cannot open it, check the libbladeRF build and installation path.
Step 3: Use bladeRF-cli Before GNU Radio
bladeRF-cli is the first real diagnostic tool. If bladeRF-cli cannot detect the board, GNU Radio will not fix the problem.
Probe for connected devices
bladeRF-cli -pIf the device is detected, continue with:
bladeRF-cli -iInside interactive mode, run:
info
version
You can also run both commands directly:
bladeRF-cli -e version -e infoWhat to look for in the output
| Output field | What it tells you |
|---|---|
| Backend | Usually shows the low-level USB backend used by libbladeRF. |
| USB speed | Should ideally show SuperSpeed for USB 3.0 operation. |
| Firmware version | Shows the FX3 firmware version on the device. |
| FPGA size | Helps identify whether the board needs the xA4 or xA9 image. |
| FPGA loaded | Shows whether the FPGA is configured. |
| libbladeRF version | Shows which host library your tools are using. |
Step 4: Fix Linux Permissions and udev Rules
If bladeRF works only with sudo, the hardware is probably fine. The problem is usually Linux permissions.
Install the official packages on Ubuntu
For Ubuntu 20.04 or later, use the Nuand PPA:
sudo add-apt-repository ppa:nuandllc/bladerf
sudo apt-get update
sudo apt-get install bladerf
If you need development headers for GNU Radio support, custom software, or source builds:
sudo apt-get install libbladerf-devInstall firmware and FPGA packages
sudo apt-get install bladerf-firmware-fx3For bladeRF 2.0 micro xA4:
sudo apt-get install bladerf-fpga-hostedxa4For bladeRF 2.0 micro xA9:
sudo apt-get install bladerf-fpga-hostedxa9Check your user group
groupsIf your distribution uses a bladeRF, plugdev, or custom group for USB access, make sure your user is in that group. After changing groups, log out and back in before testing again.
Retest without sudo
bladeRF-cli -p
bladeRF-cli -e version -e info
Do not use sudo as the permanent solution. It can hide environment problems and cause confusion later when GNU Radio, Python, or SDR applications run as a normal user.
Step 5: Fix Windows Driver Problems
On Windows, start with the official Nuand installer. Nuand states that the installer includes libbladeRF, bladeRF-cli, drivers, and MATLAB/Simulink support.
Recommended Windows repair process
- Disconnect the bladeRF from USB.
- Install or reinstall the current official Nuand Windows installer.
- Restart Windows if the installer or driver state requires it.
- Connect the bladeRF directly to a USB 3.0 port.
- Open Command Prompt.
- Run
bladeRF-cli -p. - Run
bladeRF-cli -e version -e info.
Windows signs of driver trouble
- Device Manager shows an unknown USB device.
- bladeRF-cli closes immediately.
- bladeRF-cli cannot open the device even though Windows made a USB connection sound.
- Old driver packages were installed before the current Nuand installer.
- Different USB ports behave inconsistently.
If the device appears in Device Manager but not in bladeRF-cli, remove stale driver attempts and reinstall the official package. Avoid installing random third-party USB drivers unless Nuand documentation or support specifically tells you to do so.
Step 6: Fix “FPGA Not Loaded”
Seeing FPGA loaded: no does not usually mean the SDR is broken. It means the FPGA has not been configured yet.
Check the board type first
Run:
bladeRF-cli -e infoLook for the FPGA size and model direction. Then use the correct hosted image:
| Board | Correct FPGA image direction |
|---|---|
| bladeRF 2.0 micro xA4 | hosted xA4 image or bladerf-fpga-hostedxa4 package |
| bladeRF 2.0 micro xA9 | hosted xA9 image or bladerf-fpga-hostedxa9 package |
Manually load the FPGA image
bladeRF-cli -l /path/to/hostedxA4_or_hostedxA9.rbfOr in interactive mode:
bladeRF-cli -i
load fpga /path/to/hostedxA4_or_hostedxA9.rbf
After loading, run:
bladeRF-cli -e version -e infoThe output should no longer report the FPGA as not loaded.
Do not use the wrong xA4 or xA9 image
The xA4 and xA9 have different FPGA capacities. A wrong image is one of the easiest mistakes to make when several boards are used in the same lab.
If you are unsure which board you bought, compare the current listings for bladeRF 2.0 micro xA4 and bladeRF 2.0 micro xA9.
Step 7: Be Careful with FPGA Autoload and Firmware Flashing
Nuand supports FPGA autoloading, but it should not be the first thing you change when troubleshooting. Start with host-based loading first because it is easier to undo.
Write an FPGA image to SPI flash
bladeRF-cli -L /path/to/hostedxA4_or_hostedxA9.rbfDisable FPGA autoload
bladeRF-cli -L XNuand recommends disabling FPGA autoload before upgrading device firmware to avoid potential conflicts. For most users, it is better to keep the troubleshooting path simple: make the board work with manual or package-based FPGA loading first, then consider autoload only after the setup is stable.
Step 8: Do Not Flash Firmware Unless You Need To
Firmware updates can fix real issues, but they are not a magic first step. If your bladeRF is detected, the FPGA loads, and your workflow is stable, do not update firmware just because a newer file exists.
When firmware update makes sense
- Nuand release notes require it.
- The installed software warns that firmware is outdated.
- Nuand support recommends updating.
- You need a feature or fix tied to a newer firmware release.
Ubuntu firmware flashing direction
If you installed the firmware package from the Nuand PPA, Nuand documents a firmware command using the installed firmware image path:
sudo bladeRF-cli --flash-firmware /usr/share/Nuand/bladeRF/bladeRF_fw.imgAfter flashing, disconnect and reconnect the device, then check:
bladeRF-cli -e version -e infoFirmware safety notes
- Use official Nuand firmware images only.
- Do not disconnect the device during flashing.
- Use a reliable USB port and cable.
- Disable FPGA autoload before firmware upgrades when applicable.
- Record the old firmware version before updating.
Step 9: Fix libbladeRF Library Problems
If the hardware is visible but tools fail with library errors, the issue may be the installed libbladeRF version, missing development files, library path, or a mixed package/source installation.
Common libbladeRF symptoms
libbladeRF.sonot foundlibbladeRF.so.0not found- bladeRF-cli uses an older library than expected
- GNU Radio finds a different libbladeRF than the terminal
- Source-built tools conflict with distribution packages
Check installed versions
bladeRF-cli -e versionIf you built from source, make sure the library path was updated:
sudo ldconfigAvoid mixed installations
Do not mix an old distribution package, a Nuand PPA package, and a manual source build unless you know exactly which binary and library path is being used. Many “not detected” problems are actually version or path conflicts.
For a clean setup, choose one of these paths:
- Nuand PPA packages on Ubuntu
- Official Nuand Windows installer on Windows
- One documented source build from the official Nuand GitHub repository
Step 10: Build from Source Only When Needed
Source builds are useful for developers, but they can complicate troubleshooting. Use packages first when possible.
Linux source build direction
git clone https://github.com/Nuand/bladeRF.git ./bladeRF
cd ./bladeRF/host
mkdir build
cd build
cmake -DCMAKE_BUILD_TYPE=Release -DCMAKE_INSTALL_PREFIX=/usr/local -DINSTALL_UDEV_RULES=ON ../
make
sudo make install
sudo ldconfig
After installing, reconnect the board and run:
bladeRF-cli -p
bladeRF-cli -e version -e info
If you install udev rules through the source build, confirm your user is in the selected group and log out/back in if needed.
Step 11: Fix GNU Radio Not Seeing bladeRF
If bladeRF-cli works but GNU Radio does not, your board is probably detected correctly. The problem is likely the GNU Radio integration layer.
Before opening GNU Radio
Confirm:
bladeRF-cli -e version -e infoThen close bladeRF-cli before opening GNU Radio. Only one program can open the bladeRF at a time.
GNU Radio checklist
- Install GNU Radio and gr-osmosdr or a supported SoapySDR workflow.
- Launch GNU Radio Companion from the same environment where the SDR modules are installed.
- Check Python path issues if you built GNU Radio manually.
- Use a simple receive-only flowgraph first.
- Use a conservative sample rate such as 1 MSPS to 5 MSPS for initial tests.
- Close SDR Console, GQRX, SDR#, or other tools before opening the board in GNU Radio.
Common device strings
For gr-osmosdr workflows, a common starting device argument is:
bladerf=0For SoapySDR workflows, the device string may use a driver direction such as:
driver=bladerfThe exact device string can depend on your GNU Radio version, installed blocks, and SoapySDR modules.
Step 12: Fix USB Timeouts, Dropped Samples, or Unstable Streaming
If bladeRF is detected but streams unreliably, the issue is often throughput, host performance, or USB stability rather than detection.
Try these fixes
- Reduce sample rate.
- Use a direct USB 3.0 port.
- Replace the USB cable.
- Avoid virtual machines for high-rate testing.
- Close other high-bandwidth USB devices.
- Use a simpler GNU Radio flowgraph.
- Check CPU usage and disk activity.
- Confirm the board reports SuperSpeed where required.
- Avoid very high sample rates until the basic setup is stable.
Start with a simple test
On a GNU Radio or gr-osmosdr setup, start with a modest receive test before attempting MIMO, transmit, or high-rate streaming.
osmocom_fft -a bladerf=0 -s 2500000 -f 446000000Use only frequencies you are legally allowed to receive in your location and test environment.
Step 13: Fix “Device Already Open” Problems
Only one program can open the bladeRF at a time. If GNU Radio cannot access the device, another application may already be using it.
Close possible conflicting programs
- bladeRF-cli interactive sessions
- GNU Radio flowgraphs
- GQRX
- SDR Console
- SDR#
- Python scripts
- Background services or previous crashed processes
Unplug and reconnect the board if a crashed application left the USB state confused. On Linux, you can also check running SDR-related processes before reconnecting.
Step 14: Diagnose by Symptom
| Error or symptom | Likely cause | Recommended action |
|---|---|---|
No devices available |
USB, driver, permissions, or another program holding the device | Check OS USB detection, close other programs, and test bladeRF-cli -p. |
FPGA version: Unknown |
FPGA not loaded | Load the correct xA4 or xA9 FPGA image. |
FPGA loaded: no |
No active FPGA bitstream | Install the correct hosted FPGA package or use bladeRF-cli -l. |
| Device visible only as root | Linux permission issue | Install udev rules and add the user to the correct group. |
| Windows unknown USB device | Driver issue | Install the official Nuand Windows installer. |
libbladeRF.so missing |
Library path or incomplete install | Install libbladeRF correctly and run sudo ldconfig after source installs. |
| GNU Radio source block fails | gr-osmosdr or SoapySDR issue | Verify bladeRF-cli first, then check GNU Radio module installation. |
| USB speed is not SuperSpeed | Cable, port, hub, or host controller issue | Try another cable and direct USB 3.0 port. |
| Streaming starts then fails | Sample rate too high or host overloaded | Lower sample rate and simplify the flowgraph. |
When to Suspect Hardware Damage
Most detection problems are software, driver, USB, or FPGA-image issues. Suspect hardware only after testing the board on another computer with a known-good cable and a clean official installation.
Possible hardware warning signs
- The board is not visible at the USB level on multiple computers.
- Different known-good USB 3.0 cables and ports make no difference.
- The board becomes unusually hot immediately after connection.
- There is visible physical damage.
- The problem began after an incorrect RF connection, overvoltage, or unsafe transmit setup.
If the board was damaged through RF misuse, the USB interface may still work while RF performance is affected. Use a safe test setup and compare with known-good equipment before concluding.
Prevent Future bladeRF Setup Problems
- Keep a known-good software image for the lab.
- Record the libbladeRF version, firmware version, and FPGA image version.
- Label each board as xA4 or xA9.
- Store the matching FPGA images in a documented folder.
- Use short, reliable USB 3.0 cables.
- Avoid mixing package installs and source installs.
- Start every new workstation with
bladeRF-cli -pandbladeRF-cli -e version -e info. - Use receive-only tests before transmit tests.
- Document working GNU Radio device strings.
Recommended bladeRF Products and Accessories
If you are still planning a bladeRF purchase, choose the model based on your workflow.
| Product | Best fit |
|---|---|
| bladeRF 2.0 micro xA4 | GNU Radio, portable 2×2 MIMO, host-side DSP, and university lab work. |
| bladeRF 2.0 micro xA9 | FPGA-heavy research, HDL accelerators, custom modem work, and advanced DSP. |
| bladeRF 2.0 micro xA9 THERMAL | Demanding thermal environments where xA9 FPGA capacity is required. |
| bladeRF accessories | Cases, amplifiers, cables, adapters, and related hardware for lab setups. |
For model selection, read bladeRF 2.0 micro xA4 vs xA9 and bladeRF 2.0 micro Setup Guide.
RF Safety Notes for Troubleshooting
Do not begin troubleshooting with active transmission. First make the device visible, load the FPGA, confirm receive operation, and only then test transmit in a controlled environment.
- Use a 50-ohm dummy load when radiation is unnecessary.
- Use suitable attenuation before receiver inputs.
- Do not connect TX directly to RX without a safe attenuation plan.
- Verify power levels before connecting measurement equipment.
- Use shielding where appropriate.
- Transmit only where you are legally permitted and authorized.
Request a Quote for bladeRF Lab Hardware
Universities, laboratories, cybersecurity firms, telecom teams, engineering departments, integrators, and businesses can request a formal quotation directly from SDRstore.eu.
Use the Add to Quote button on product pages or the document icon on product cards. Add the required bladeRF boards, accessories, antennas, cables, attenuators, dummy loads, and test tools to one quote request.
A quote request is useful when you need:
- Multiple bladeRF xA4 or xA9 units
- A complete GNU Radio lab setup
- Formal pricing for university procurement
- Accessories included in the same offer
- Replacement cables, cases, or RF accessories
- A phased SDR lab rollout
Read the SDRstore.eu quote-request guide.
Related SDRstore.eu Guides
- bladeRF 2.0 micro Setup Guide: Drivers, libbladeRF, FPGA Image, and GNU Radio
- bladeRF 2.0 micro xA4 vs xA9: Which SDR Should You Buy?
- bladeRF 2.0 micro vs USRP B210: Which 2×2 MIMO SDR Is Better for Research?
- bladeRF vs LimeSDR: Which SDR Is Better for MIMO, GNU Radio, and FPGA Development?
- Best SDR for GNU Radio Projects: RTL-SDR, HackRF, PlutoSDR, bladeRF, and USRP
- RF Cybersecurity Lab Equipment Checklist
Official Resources
- Nuand bladeRF troubleshooting guide
- Nuand bladeRF basic device verification guide
- Nuand bladeRF Linux getting-started guide
- Nuand bladeRF Windows installers
- Nuand bladeRF FPGA autoloading guide
- Nuand bladeRF official GitHub repository
- Nuand bladeRF 2.0 micro official overview
Final Recommendation
When bladeRF is not detected, troubleshoot in order. First check USB 3.0, cable, port, and OS-level detection. Then test with bladeRF-cli -p, version, and info. If the device appears only with sudo on Linux, fix udev rules and user groups. If the FPGA is not loaded, install or load the correct xA4 or xA9 image. If Windows cannot open the device, reinstall the official Nuand installer. If GNU Radio fails, verify bladeRF-cli first and then check gr-osmosdr or SoapySDR integration.
Do not start by flashing firmware, changing FPGA autoload, or rebuilding GNU Radio from source. The fastest fix is usually a clean USB path, correct driver or permission setup, matching FPGA image, and one known-good libbladeRF installation.
FAQ
Why is my bladeRF not detected?
The most common causes are a bad USB cable, weak USB port, missing Windows driver, Linux udev permission issue, another program already using the device, broken libbladeRF installation, or a board that is detected but has not loaded the FPGA image yet.
How do I check if bladeRF is detected?
Run bladeRF-cli -p. If the device appears, run bladeRF-cli -e version -e info to check firmware, FPGA status, USB speed, backend, and device information.
What does FPGA loaded: no mean?
It means the FPGA has not been configured. Install the correct hosted FPGA package for your xA4 or xA9 board, or manually load the correct .rbf image with bladeRF-cli -l.
Which FPGA image do I need for bladeRF xA4?
Use the hosted xA4 FPGA image or the bladerf-fpga-hostedxa4 package. Do not use an xA9 image on an xA4 board.
Which FPGA image do I need for bladeRF xA9?
Use the hosted xA9 FPGA image or the bladerf-fpga-hostedxa9 package. The xA9 has a different FPGA size and requires the correct image.
Why does bladeRF work only with sudo on Linux?
This is usually a USB permission or udev rule issue. Install the proper udev rules, ensure your user is in the required group, log out and back in, reconnect the board, and test again without sudo.
How do I fix bladeRF on Windows?
Disconnect the board, install or reinstall the official Nuand Windows installer, reconnect the board to a direct USB 3.0 port, and test with bladeRF-cli -p and bladeRF-cli -e version -e info.
Should I update bladeRF firmware if the board is not detected?
Not as the first step. Check USB, driver, permissions, and bladeRF-cli detection first. Update firmware only when Nuand documentation, release notes, or support guidance indicates that an update is required.
Why does GNU Radio not see bladeRF?
If bladeRF-cli works, GNU Radio likely has a gr-osmosdr, SoapySDR, Python path, or environment issue. Close other SDR programs, verify bladeRF-cli, then test a simple receive-only GNU Radio flowgraph.
Can more than one program use bladeRF at the same time?
No. Only one program can normally open the bladeRF at a time. Close bladeRF-cli, GNU Radio, GQRX, SDR Console, SDR#, Python scripts, or other SDR tools before opening the device elsewhere.
No posts found
Write a review






We support all major card and digital payment options. More local methods are available and shown during checkout.
You enter into a binding sales contract once you have received an 'order confirmation and sales receipt' email from us, in line with our Sales & Delivery conditions. Therefore, sdrstore.eu has the right to cancel your order in the event of technical problems, delivery failure, Fair use policy and other similar situations.





Your payments are protected by advanced encryption and 3-D Secure authentication for safe online shopping.