





RTL-SDR V4L Setup Guide: Windows, Linux, Raspberry Pi, SDR++, SDR# and ADS-B
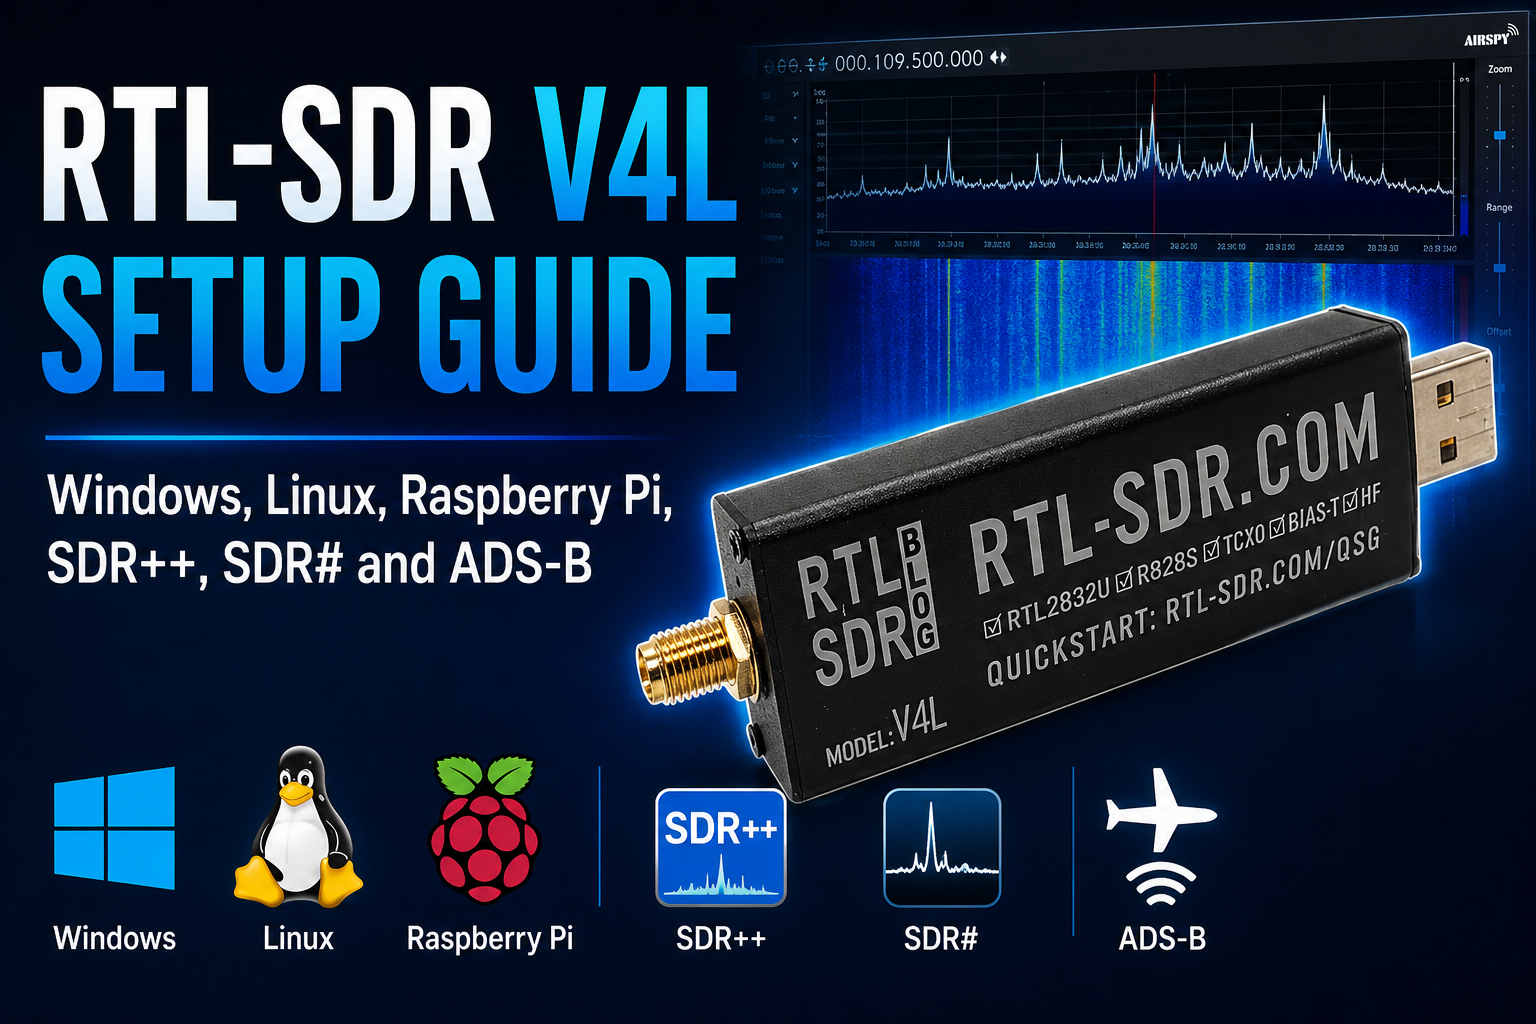
The RTL-SDR Blog V4L, also called the RTL-SDR V4 Lite, is now available—and setting it up correctly is slightly different from setting up a generic RTL-SDR, V3 or even the original V4.
The reason is the new Rafael Micro R828S tuner. RTL-SDR Blog had not previously used the R828S in an RTL-SDR product, so the V4L requires an updated RTL-SDR driver that knows how to identify and configure it correctly.
If you plug a V4L into a computer with an old RTL-SDR library, the USB device may appear to exist while receiving no useful RF signal at all. Installing the correct V4L-compatible driver is therefore the first step—not something to troubleshoot after everything else fails.
This guide covers the complete RTL-SDR V4L setup on Windows, Linux and Raspberry Pi, including SDR++, SDRSharp, HF reception, the software bias tee and a dedicated 1090 MHz ADS-B aircraft-tracking station.
You can view or order the RTL-SDR Blog V4L (Lite) R828S SDR Dongle at SDRstore.eu.
RTL-SDR V4L Setup: Quick Start
If you already understand RTL-SDR basics, this is the short version:
- Connect the RTL-SDR Blog V4L to USB.
- Install a current V4L-compatible RTL-SDR driver.
- On Windows, install WinUSB for the RTL-SDR interface with Zadig.
- Make sure SDR++ or SDR# is using a V4L-aware
rtlsdr.dll. - On Linux or Raspberry Pi, install the latest V4L-compatible
librtlsdr. - Run
rtl_test -twhere available to verify the receiver. - Start with a strong FM broadcast station around 88–108 MHz.
- Only after the first signal works should you configure HF, satellites, ADS-B or other decoders.
Do not troubleshoot antennas, gain or ADS-B software until you have confirmed that the correct V4L driver is installed.
What Is the RTL-SDR Blog V4L?
The V4L is the limited-edition successor to the original RTL-SDR Blog V4.
The original V4 depended on the Rafael Micro R828D tuner. RTL-SDR Blog announced in May 2026 that usable R828D stock had been exhausted and that further normal V4 production was no longer possible.
V4L continues the V4 architecture using a stockpile of R828S tuners.
| Feature | RTL-SDR Blog V4L |
|---|---|
| Tuner | Rafael Micro R828S |
| ADC | RTL2832U, 8-bit |
| Frequency coverage | Approximately 500 kHz–1.766 GHz |
| Stable instantaneous bandwidth | Approximately 2.56 MHz |
| Maximum sample/bandwidth direction | Up to approximately 3.2 MHz, with dropped samples possible |
| Reference oscillator | 1 PPM TCXO |
| HF reception | Built-in 28.8 MHz upconverter |
| Bias tee | Software controlled, approximately 4.5 V |
| Bias-tee current | Up to approximately 180 mA continuous |
| RF connector | 50 Ω SMA female |
| RF front end | Diplexed HF + VHF/UHF design |
| USB | USB-A male |
| Enclosure | Aluminium with passive thermal coupling |
| Transmit capability | None — receive only |
RTL-SDR V4L vs Original V4
The biggest hardware difference is the tuner and RF-input architecture.
| Feature | V4L | Original V4 |
|---|---|---|
| Tuner | R828S | R828D |
| Tuner RF inputs | 2 | 3 |
| RF front end | Diplexed | Triplexed |
| HF upconverter | Yes | Yes |
| 1 PPM TCXO | Yes | Yes |
| Software bias tee | Yes | Yes |
| Out-of-band filtering | Reduced | More extensive |
| Sensitivity direction | Slightly improved because of lower filter loss | Very good |
| Driver requirement | New V4L-aware driver required | V4-aware driver required |
The reduced filtering does not make V4L universally worse. Fewer filter losses can improve sensitivity, but users in very strong RF environments may benefit more often from an external band-pass or notch filter.
For more background, read RTL-SDR Blog V4 Lite Explained: R828S, Driver Update, and What Changes.
The Most Important V4L Rule: Update the Driver
The V4L is not simply another R820T/R860-style RTL-SDR.
The R828S can identify over I2C similarly to other tuner-family devices, so the driver uses information stored in the RTL-SDR EEPROM to identify the V4L correctly.
RTL-SDR Blog specifies these EEPROM strings:
Manufacturer: RTLSDRBlog
Product: Blog V4L
The driver uses those strings to apply the correct V4L tuner and RF-input behavior.
Do not change the V4L manufacturer or product EEPROM strings.
If you rewrite them with rtl_eeprom, the updated driver may no longer recognize the dongle as a V4L.
Two Different Drivers Matter on Windows
Windows users should understand that two different pieces are involved.
1. WinUSB
WinUSB gives SDR applications access to the RTL2832U USB interface.
Zadig is normally used to install it.
2. rtlsdr.dll
The RTL-SDR library understands the tuner hardware and controls frequency, gain, bias tee and RF switching.
The V4L needs a version that understands the R828S-based V4L architecture.
This means:
Correct Zadig installation + old rtlsdr.dll = V4L may still receive nothing.
You need both layers configured correctly.
RTL-SDR V4L Windows Setup
Step 1: Plug the V4L into USB
Connect the V4L directly to the PC for the first setup.
Avoid:
- cheap USB hubs;
- very long USB extension cables;
- running several RTL-SDR applications simultaneously.
Windows may automatically install a television-tuner driver. That is normal.
Step 2: Install WinUSB with Zadig
- Download Zadig from the official Zadig website.
- Run Zadig as administrator.
- Select Options → List All Devices.
- Find the RTL-SDR entry.
- It may appear as Bulk-In, Interface (Interface 0), RTL2832U, RTL2838 or an RTL-prefixed device.
- Select Interface 0, not Interface 1.
- Choose WinUSB as the replacement driver.
- Click Install Driver or Replace Driver.
Be careful with Zadig. Installing WinUSB onto a keyboard, mouse, Bluetooth controller or another USB device can break that device's normal Windows driver until it is restored.
For a more detailed Zadig walkthrough, see RTL-SDR Setup Guide for Windows: SDRSharp, SDR++, Zadig, Drivers, and First Signal.
Step 3: Install the latest V4L RTL-SDR library
RTL-SDR Blog's current V4L guide provides updated Windows libraries through the RTL-SDR Blog driver release.
For most 64-bit programs, use the x64 version of rtlsdr.dll.
For 32-bit applications such as SDR#, use the x86 DLL.
The normal manual procedure is:
- Download the latest RTL-SDR Blog driver release.
- Open the x64 or x86 folder, depending on the application.
- Find
rtlsdr.dll. - Copy it into the SDR application's folder.
- Replace the older
rtlsdr.dllif one exists. - Restart the program.
Some Windows configurations may also need the runtime DLL files supplied alongside the RTL-SDR driver release.
RTL-SDR V4L Setup with SDR++ on Windows
SDR++ is our preferred first application for most new V4L users.
It is modern, lightweight and available for Windows, Linux and other platforms.
Step 1: Download a current SDR++ build
Use the current SDR++ build rather than an old archived installation. SDR++ follows a rolling/nightly development model, and current builds are the safest option when using recently released hardware.
Step 2: Extract and open SDR++
On Windows:
- Extract the SDR++ package.
- Open the SDR++ folder.
- Confirm that the V4L-compatible x64
rtlsdr.dllis being used. - Launch
sdrpp.exe.
Step 3: Select RTL-SDR
In the Source panel:
- Select RTL-SDR.
- Select the connected V4L device.
- Choose a sample rate such as 2.4 MSPS.
- Start with automatic or moderate manual gain.
- Press Play.
Step 4: Test FM broadcast
Tune to a strong local station between:
88–108 MHz
Select:
- WFM demodulation;
- roughly 150–250 kHz audio/RF filter width;
- moderate gain.
If the driver and antenna are working, you should see a strong wide FM signal immediately.
RTL-SDR V4L Setup with SDR# / SDRSharp
SDR# remains an excellent Windows choice, particularly for users who want its plugin ecosystem or are following older RTL-SDR tutorials.
RTL-SDR Blog's official V4L guide states that the latest SDR# installer script downloads the RTL-SDR Blog driver branch.
Recommended SDR# setup
- Download the current SDR# package from Airspy.
- Extract it fully to a normal folder.
- Do not run SDR# directly from inside the ZIP archive.
- Avoid putting the installation inside
Program Filesif Windows permissions cause issues. - Run
install-rtlsdr.bat. - Confirm that a current V4L-compatible
rtlsdr.dllhas been downloaded. - Use Zadig to install WinUSB on RTL-SDR Interface 0 if it has not already been done.
- Open SDR#.
- Select RTL-SDR USB as the source.
- Press Play.
SDR# is a 32-bit application in the common RTL-SDR workflow, so manual driver replacement should use the appropriate x86 RTL-SDR DLL.
Best First V4L Settings
| Setting | Recommended first test |
|---|---|
| Frequency | Strong local FM station |
| Band | 88–108 MHz |
| Mode | WFM |
| Sample rate | 2.4 MSPS |
| Gain | Start moderate, then optimize manually |
| Bias tee | OFF |
| Direct sampling | OFF |
| Antenna | VHF-capable antenna near a window or outdoors |
Do not start by testing HF, satellites or a weak ADS-B station. First prove that the V4L works on a strong known signal.
How to Set RTL-SDR Gain Correctly
Maximum gain is not automatically best.
Increase gain until the desired signal becomes clearly visible above the noise floor, but stop when:
- the entire waterfall becomes bright;
- many fake-looking signals appear;
- the noise floor rises dramatically;
- strong transmitters create images elsewhere in the spectrum.
V4L has less front-end filtering than the original V4, which can make gain management and external filtering more important in extremely strong RF environments.
HF Setup on the RTL-SDR V4L
HF operation is one of the V4L's most interesting features.
Unlike RTL-SDR Blog V3, V4L does not require Q-branch direct sampling for HF.
It has a built-in upconverter using a 28.8 MHz local oscillator.
With the correct driver installed, simply enter the actual HF frequency you want to receive.
Example frequencies
- 7.0–7.3 MHz amateur 40 m band;
- 10 MHz standard/time-signal region where locally available;
- 14.0–14.35 MHz amateur 20 m band;
- international shortwave broadcast bands;
- 27 MHz CB band.
You do not manually add 28.8 MHz to the displayed tuning frequency. The driver and hardware architecture handle the conversion.
Do not enable direct sampling
RTL-SDR Blog explicitly states that activating direct sampling on the V4/V4L architecture will not provide useful HF reception.
For V4L:
enter the HF frequency normally and leave direct sampling disabled.
Best Antenna for RTL-SDR V4L HF Reception
The receiver may tune to 500 kHz, but antenna performance still determines what you can actually hear.
Consider:
- long-wire receiving antenna;
- active magnetic loop;
- HF dipole;
- end-fed receiving antenna;
- other antenna designed for the desired HF band.
A tiny VHF telescopic antenna will not suddenly become an efficient 7 MHz antenna just because the V4L can tune to 7 MHz.
RTL-SDR V4L Bias Tee Setup
V4L includes a software-controlled bias tee that supplies approximately:
4.5 V, up to around 180 mA continuous
through the center conductor of the SMA connector.
This can power compatible:
- LNAs;
- active antennas;
- filtered ADS-B amplifiers;
- other RF accessories designed for 4.5 V bias-tee power.
Read Bias Tee Explained: Powering LNAs and Active Antennas Through Coax before using the feature if you are unfamiliar with DC-over-coax systems.
Bias tee on Windows
When using the RTL-SDR Blog driver, the otherwise unused Offset Tuning control can act as a bias-tee switch in compatible applications.
RTL-SDR Blog also supplies rtl_biast.exe.
With all SDR software closed:
rtl_biast -b 1turns bias power on.
rtl_biast -b 0turns it off.
Bias tee on Linux
rtl_biast -b 1Enable.
rtl_biast -b 0Disable.
Important bias-tee warning
Do not enable bias power into an antenna or RF device that presents a DC short unless the system has the appropriate powered LNA/DC isolation between the antenna and dongle.
A safe arrangement can be:
DC-short antenna → compatible LNA → coax → V4L with bias tee ON
A potentially unsafe arrangement is:
DC-short antenna → coax → V4L with bias tee ON
The V4L bias circuit includes protection, but protection should not be treated as permission to operate continuously into a short.
RTL-SDR V4L Linux Setup
On Linux, the biggest issue is ensuring that the system is using a sufficiently new librtlsdr with V4L support rather than an older distribution package.
The current RTL-SDR Blog V4L guide recommends removing existing libraries and building the updated Osmocom driver.
Step 1: Remove old RTL-SDR libraries
sudo apt purge '^librtlsdr'
sudo rm -rvf /usr/lib/librtlsdr* \
/usr/include/rtl-sdr* \
/usr/local/lib/librtlsdr* \
/usr/local/include/rtl-sdr* \
/usr/local/include/rtl_* \
/usr/local/bin/rtl_*
Step 2: Install build dependencies
sudo apt update
sudo apt install libusb-1.0-0-dev git cmake pkg-config build-essential
Step 3: Download current rtl-sdr
git clone https://github.com/osmocom/rtl-sdr
cd rtl-sdr
mkdir build
cd build
Step 4: Build and install
cmake ../ -DINSTALL_UDEV_RULES=ON
make
sudo make install
sudo cp ../rtl-sdr.rules /etc/udev/rules.d/
sudo ldconfig
Step 5: Blacklist the Linux DVB driver
echo 'blacklist dvb_usb_rtl28xxu' | sudo tee --append /etc/modprobe.d/blacklist-dvb_usb_rtl28xxu.confThen reboot:
sudo rebootWhy Blacklist dvb_usb_rtl28xxu?
Linux may recognize the RTL2832U as a television receiver and automatically claim it using the kernel DVB driver.
When that happens, SDR applications may report:
- device busy;
- cannot open RTL-SDR;
- no compatible device;
- USB access errors.
The DVB driver can also interact with antenna power in ways that are not desirable for SDR use.
Blacklisting it prevents the television subsystem from claiming the dongle after boot.
Test the V4L on Linux
After rebooting:
rtl_test -tIf the driver is installed correctly, the program should discover the RTL-SDR rather than reporting that no supported devices are available.
If the USB device is detected but the receiver produces no normal signals, verify that the system has not loaded an older V4L-incompatible librtlsdr.
SDR++ Setup on Linux
Current SDR++ builds are available for Debian-based distributions including Bookworm and Trixie on supported architectures.
The important distinction from Windows is that SDR++ will normally use the system RTL-SDR library.
Therefore:
install the V4L-compatible librtlsdr first, then troubleshoot SDR++.
A typical workflow is:
- Install the updated RTL-SDR driver.
- Run
rtl_test -t. - Install the current SDR++ package for your distribution.
- Start SDR++.
- Select RTL-SDR as the source.
- Select the V4L.
- Set approximately 2.4 MSPS.
- Tune to a known FM broadcast station.
RTL-SDR V4L Raspberry Pi Setup
V4L works well as an inexpensive always-on receiver for projects such as:
- ADS-B;
- AIS;
- ACARS;
- radiosondes;
- OpenWebRX;
- remote RTL-TCP receivers;
- environmental RF monitoring.
The main challenge is again driver version.
Pre-built Raspberry Pi images may contain older librtlsdr packages that understand V3 or V4 but not the new V4L.
Recommended Raspberry Pi Driver Method
For systems that depend on Debian packages—especially FlightAware, FlightRadar24, ADSBExchange and OpenWebRX-style installations—RTL-SDR Blog recommends building updated Debian packages rather than simply installing a library manually into /usr/local.
This keeps package-dependent software connected to an updated RTL-SDR library.
Install build tools
sudo apt update
sudo apt install libusb-1.0-0-dev git cmake build-essential pkg-config debhelper
Build current rtl-sdr packages
git clone https://github.com/osmocom/rtl-sdr
cd rtl-sdr
sudo dpkg-buildpackage -b --no-sign
cd ..
Install the generated packages
sudo dpkg -i librtlsdr0_*.deb
sudo dpkg -i librtlsdr-dev_*.deb
sudo dpkg -i rtl-sdr_*.deb
Package names can change in future Debian releases. If a generated package uses a newer library package name, install the corresponding generated packages rather than blindly assuming the suffix remains unchanged forever.
Then reboot:
sudo rebootRaspberry Pi Power Tips
The V4L product specification lists typical consumption around 250–270 mA before considering a powered bias-tee accessory.
For reliable operation:
- use a proper Raspberry Pi power supply;
- avoid unpowered USB hubs;
- avoid very thin USB extension cables;
- check undervoltage warnings;
- use a powered hub if several SDRs or USB devices are attached;
- remember that a bias-powered LNA adds to the power requirement.
Use RTL-TCP for a Remote Raspberry Pi SDR
Once the correct RTL-SDR library is installed, the V4L can be exposed over a local network with:
rtl_tcp -a 0.0.0.0You can then connect using compatible software on another computer.
Only expose rtl_tcp on networks you trust unless you deliberately secure and firewall the service. It was designed as a simple SDR streaming protocol rather than an Internet-facing authenticated service.
RTL-SDR V4L ADS-B Setup
ADS-B aircraft tracking is one of the best V4L projects because the receiver comfortably covers the primary:
1090 MHz Mode S / ADS-B frequency
The complete receiving chain is:
Aircraft → 1090 MHz antenna → optional filter/LNA → RTL-SDR V4L → dump1090/readsb → map
What You Need for ADS-B
- RTL-SDR Blog V4L;
- Raspberry Pi or Linux computer;
- dedicated 1090 MHz antenna;
- short or low-loss coax where possible;
- dump1090-family or readsb decoder;
- optional 1090 MHz filter;
- optional compatible bias-powered LNA.
See Best SDR for ADS-B: RTL-SDR Kits, Antennas, Filters, and LNAs Compared for hardware selection.
Why Antenna Placement Matters More Than Maximum Gain
1090 MHz signals are largely line-of-sight.
Moving an antenna from a desk to a high window, attic, balcony, roof or mast can dramatically increase aircraft range.
Prioritize:
- clear view of the horizon;
- higher antenna placement;
- 1090 MHz antenna tuning;
- short/low-loss cable;
- then LNA and filtering where appropriate.
Do not assume maximum tuner gain will compensate for a poorly positioned antenna.
V4L Filtering and ADS-B
The original V4 used a more extensive triplexed front end.
The V4L's R828S allows only a diplexed arrangement.
The lower insertion loss can improve sensitivity, but the reduced filtering can also make an external 1090 MHz band-pass filter more useful if you live close to powerful:
- FM/DAB transmitters;
- cellular base stations;
- other high-power RF infrastructure.
Do not buy an LNA automatically. If the receiver is already overloaded, amplification can make ADS-B reception worse.
PiAware + RTL-SDR V4L
FlightAware's current PiAware packages support Raspberry Pi OS releases including Trixie, Bookworm and Bullseye.
The normal FlightAware stack uses:
- dump1090-fa to receive and decode 1090 MHz Mode S / ADS-B;
- PiAware to forward eligible data to FlightAware.
For a new installation, follow FlightAware's current Raspberry Pi repository instructions and install:
sudo apt update
sudo apt install piaware
sudo apt install dump1090-fa
After the normal PiAware/dump1090 installation, make sure its RTL-SDR library has been updated to the current V4L-compatible version using the Debian-package method described above.
This order is useful because installing an ADS-B software stack can otherwise pull an older RTL-SDR library back from a distribution repository.
Check dump1090-fa
After rebooting:
sudo systemctl status dump1090-faYou can also check PiAware:
sudo systemctl status piawareIf dump1090 repeatedly fails to access the RTL-SDR, check:
- whether another program has the dongle open;
- the V4L driver version;
- the DVB kernel driver;
- USB power;
- the receiver serial/device selection.
Powering an ADS-B LNA from the V4L
If your 1090 MHz LNA is explicitly compatible with approximately 4.5 V bias-tee power, the V4L can power it through the coax.
For an always-on FlightAware station, RTL-SDR Blog documents an EEPROM option that forces the bias tee on when the compatible RTL-SDR Blog driver is used.
First stop dump1090-fa:
sudo systemctl stop dump1090-fa.serviceThen enable forced bias power:
rtl_eeprom -b 1Reboot afterward.
To remove the forced setting:
rtl_eeprom -b 0Do this only if the LNA or active antenna is explicitly compatible with the V4L's voltage and current output.
ADS-B Gain: Do Not Just Set Maximum
For ADS-B, optimize gain by comparing actual decoder performance.
Useful metrics include:
- messages per second;
- aircraft count;
- maximum reliable range;
- number of strong/clipped messages;
- noise level.
A brighter waterfall does not necessarily mean better ADS-B reception.
Strong nearby aircraft and local RF infrastructure can overload an excessively amplified receiver.
Can You Track 978 MHz UAT with V4L?
The V4L can tune to 978 MHz, but UAT usage is primarily relevant to the United States.
FlightAware supports a separate dump978-fa workflow for UAT.
In Europe and most other regions, 1090 MHz should be the first ADS-B target.
V4L Setup for Airband
V4L also works well for civilian VHF airband reception.
Typical airband coverage is:
118–137 MHz
Use:
- AM demodulation;
- a suitable VHF antenna;
- roughly 8–12 kHz receive filtering depending on channel plan and software;
- moderate gain.
Airband voice and ADS-B are different systems. ADS-B at 1090 MHz carries digital surveillance messages; airband frequencies carry voice communications.
V4L Setup for ACARS
V4L can also receive VHF ACARS/VDL2 signals when used with compatible decoder software.
See ACARS with RTL-SDR: Decode Aircraft Messages Beyond ADS-B.
V4L Setup for AIS
Marine AIS uses frequencies around 162 MHz and works well with RTL-SDR-class receivers.
See AIS Ship Tracking with RTL-SDR: Antenna, Software, and Setup Guide.
V4L Setup for Weather Satellites
The V4L covers the 137 MHz region used by several weather-satellite receiving projects.
A suitable V-dipole, QFH or other satellite antenna is far more important than merely having the correct tuning range.
For modern satellite decoding, see SatDump V2 with RTL-SDR: Complete Beginner Setup Guide.
Recommended V4L Sample Rate
For most normal SDR applications, 2.4 MSPS is a good default.
The V4L listing specifies:
- approximately 2.56 MHz stable bandwidth;
- up to approximately 3.2 MHz maximum, where dropped samples may occur.
The highest number is therefore not automatically the best setting.
Use 2.4 MSPS when you want:
- good USB stability;
- wide enough spectrum for general listening;
- lower CPU requirements;
- fewer dropped-sample problems.
V4L Troubleshooting Table
| Problem | Most likely cause | What to check |
|---|---|---|
| Device appears but receives no signals | Old RTL-SDR library | Install V4L-compatible rtlsdr.dll / librtlsdr |
| SDR++ cannot open device on Windows | WinUSB not installed | Check Zadig Interface 0 |
| SDR++ sees dongle but waterfall is empty | Wrong rtlsdr.dll | Replace with current V4L-compatible x64 library |
| SDR# receives nothing | Old x86 driver | Run current install-rtlsdr.bat or replace x86 DLL |
| Linux says device busy | DVB driver owns dongle | Blacklist dvb_usb_rtl28xxu and reboot |
| rtl_test cannot find dongle | Driver/USB/permissions issue | Check USB enumeration, udev rules and library installation |
| HF receives nothing | Direct sampling incorrectly enabled | Disable direct sampling and tune actual HF frequency |
| ADS-B sees few aircraft | Antenna or gain problem | Improve 1090 MHz antenna position and tune gain |
| ADS-B range gets worse with LNA | Receiver overload | Reduce gain or add 1090 MHz filtering |
| Bias tee does not power LNA | Wrong library or bias setting | Verify V4L driver and bias-tee control |
| Raspberry Pi works until software update | Old distribution librtlsdr restored | Check which library package is installed |
| Random USB drops | Power or USB problem | Use quality Pi supply/direct USB/powered hub |
Problem: V4L Is Detected but Receives Nothing
This is the signature V4L driver problem.
Do this before changing anything else:
- confirm it is actually a V4L;
- install the current V4L driver;
- restart the application;
- test 88–108 MHz FM;
- use a known-good antenna;
- set moderate gain.
If FM still produces no signals, only then investigate the antenna, USB connection or hardware.
Problem: Wrong Frequencies or Strange Spectrum
Again, suspect the driver before assuming the tuner is faulty.
The V4L needs driver logic for:
- R828S configuration;
- RF input switching;
- HF upconversion;
- correct tuning calculations.
An old library can behave as though it is controlling another tuner from the same family.
Problem: Linux Installed the Wrong Library
Check which libraries exist:
ldconfig -p | grep rtlsdrIf you have several copies under both /usr/lib and /usr/local/lib, an application may load a different version than expected.
This is why the official setup starts by removing older libraries before building the current version.
Problem: Only One Program Can Use the V4L
This is normal.
A local RTL-SDR USB device is normally opened exclusively by one process.
Do not simultaneously run:
- SDR++;
- SDR#;
- dump1090;
- rtl_test;
- rtl_tcp;
against the same dongle.
For multiple clients, run a supported network/server architecture rather than opening the USB device several times.
Problem: Raspberry Pi ADS-B Stops After Updating Packages
Check whether a repository update replaced your current V4L-compatible librtlsdr with an older package.
Then:
- stop dump1090/readsb;
- reinstall the current V4L-compatible Debian packages;
- reboot;
- verify the service again.
Should You Use an External Filter with V4L?
Not always.
Use a filter when measurements indicate an actual interference or overload problem.
Examples:
- 1090 MHz band-pass: ADS-B station in a strong RF environment;
- FM broadcast notch: strong 88–108 MHz transmitters causing overload;
- band-specific filter: satellite or IoT project where strong unrelated signals reduce receiver performance.
Because V4L has less built-in VHF/UHF filtering than V4, external filtering can be especially useful in difficult locations.
Should You Add an LNA?
Only when the receiving system is genuinely noise limited.
An LNA is most useful when:
- the antenna signal is weak;
- there is significant coax loss;
- the LNA can be placed near the antenna;
- the receiver is not already overloaded.
An LNA can make things worse when:
- strong local transmitters dominate the RF environment;
- the SDR is already close to overload;
- gain is already excessive;
- the amplifier is broadband and amplifies everything.
See Do You Need an LNA for SDR? When It Helps and When It Makes Signals Worse.
RTL-SDR V4L vs V3 for Beginners
| Priority | Better fit |
|---|---|
| Simplest mature driver ecosystem | V3 |
| Built-in HF upconverter | V4L |
| Direct HF tuning | V4L |
| Maximum compatibility with old software | V3 |
| Newest V4-style architecture | V4L |
| Slightly lower-loss front end | V4L |
| Most documented legacy tutorials | V3 |
V3 remains excellent hardware. V4L is more attractive when built-in HF reception and the newer V4-derived architecture are important enough to justify checking current driver compatibility.
Best Projects for the RTL-SDR V4L
| Project | Frequency direction | Extra hardware recommended |
|---|---|---|
| FM broadcast | 88–108 MHz | Basic VHF antenna |
| Airband | 118–137 MHz | VHF airband antenna |
| Weather satellites | Around 137 MHz | V-dipole/QFH |
| AIS | Around 162 MHz | Marine VHF antenna |
| 433 MHz devices | 433 MHz ISM | 433 MHz antenna |
| LoRa / Meshtastic monitoring | 868/915 MHz region | Band-specific antenna |
| ADS-B | 1090 MHz | 1090 MHz antenna; optional filter/LNA |
| HF / shortwave | Approximately 500 kHz upward | Suitable HF antenna |
| Radiosondes | Commonly 400–406 MHz region | UHF antenna |
Where to Buy the RTL-SDR V4L
SDRstore.eu currently lists the genuine RTL-SDR Blog V4L (Lite) R828S SDR Dongle.
The dongle-only version is suitable if you already own SMA antennas and RF accessories.
You can also browse the complete RTL-SDR category for receivers, antennas, LNAs and compatible accessories.
Related SDRstore.eu Guides
- RTL-SDR Blog V4 Lite Explained: R828S, Driver Update, and What Changes
- RTL-SDR Setup Guide for Windows
- Best SDR for ADS-B
- ACARS with RTL-SDR
- AIS Ship Tracking with RTL-SDR
- SatDump V2 with RTL-SDR
- Best SDR Software in 2026
- SDR++ vs SDRSharp vs SDRangel
- Bias Tee Explained
Official Technical Resources
- RTL-SDR Blog — Official V4L Users Guide
- RTL-SDR Blog — V4L Release Announcement
- RTL-SDR Blog — Official Quick Start Guide
- RTL-SDR Blog — Windows Driver Releases
- Osmocom — rtl-sdr Driver Source
- SDR++ — Current Releases
- FlightAware — PiAware and dump1090-fa Installation
Final RTL-SDR V4L Setup Recommendation
The V4L is straightforward once you remember one rule:
install the V4L-compatible RTL-SDR driver before troubleshooting anything else.
For Windows beginners, our recommended order is:
- install WinUSB with Zadig;
- install the current V4L RTL-SDR library;
- open SDR++;
- set 2.4 MSPS;
- test a strong FM station;
- then install SDR# or specialized decoder software.
For Linux:
- remove old RTL-SDR libraries;
- build/install current Osmocom rtl-sdr;
- blacklist the DVB driver;
- reboot;
- test with
rtl_test -t.
For Raspberry Pi ADS-B:
- install PiAware/dump1090 or your preferred ADS-B stack;
- replace its old RTL-SDR package with a current V4L-compatible build;
- connect a proper 1090 MHz antenna;
- optimize gain from actual ADS-B message performance;
- add a filter or LNA only when the RF environment justifies it.
For HF, simply tune to the actual HF frequency through the normal tuner interface. Do not enable direct sampling on the V4L.
Once the correct driver is installed, V4L becomes a very flexible receive-only SDR for HF, VHF, UHF, ADS-B, AIS, airband, satellites, digital modes and remote Raspberry Pi receiver projects.
FAQ
What is the RTL-SDR Blog V4L?
RTL-SDR Blog V4L, or V4 Lite, is the R828S-based successor to the discontinued R828D V4. It retains the V4-style HF upconverter, 1 PPM TCXO, software bias tee, aluminium enclosure and improved power design but uses a simpler diplexed RF front end.
Does RTL-SDR V4L need special drivers?
Yes. RTL-SDR Blog states that updated V4L-compatible RTL-SDR drivers are mandatory. An older library may detect the USB device but produce no usable received signal.
Why does V4L need a new driver?
The V4L uses an R828S tuner that had not previously been used in common RTL-SDR hardware. The driver must identify the V4L correctly and configure its tuner, RF switching and HF upconverter behavior.
How does the driver identify an RTL-SDR V4L?
RTL-SDR Blog documents the EEPROM manufacturer string as RTLSDRBlog and the product string as Blog V4L. Users should not change these strings because the driver uses them to identify the device.
Does RTL-SDR V4L work with SDR++?
Yes, with a current V4L-compatible RTL-SDR library. On Windows use the correct V4L-aware x64 rtlsdr.dll. On Linux make sure SDR++ is loading a current compatible librtlsdr.
Does RTL-SDR V4L work with SDRSharp?
Yes. RTL-SDR Blog states that current SDR# packages can install its updated RTL-SDR driver through install-rtlsdr.bat. Older SDR# installations may need their x86 rtlsdr.dll replaced manually.
Does RTL-SDR V4L work on Linux?
Yes. RTL-SDR Blog recommends installing a current V4L-compatible rtl-sdr library and blacklisting the Linux DVB driver so it does not claim the RTL2832U device.
Does RTL-SDR V4L work on Raspberry Pi?
Yes. It can be used for ADS-B, AIS, rtl_tcp, OpenWebRX and other receive-only projects. Pre-built Raspberry Pi images may need their librtlsdr packages updated before V4L works correctly.
Can RTL-SDR V4L receive ADS-B?
Yes. Its frequency coverage includes the worldwide 1090 MHz Mode S and ADS-B band. A dedicated 1090 MHz antenna is strongly recommended for good range.
Can V4L work with dump1090?
Yes, provided dump1090 is linked against a V4L-compatible RTL-SDR library. On Raspberry Pi images using older librtlsdr packages, update the library first.
Can V4L work with FlightAware PiAware?
Yes. RTL-SDR Blog provides a Debian-package update procedure specifically for FlightAware and other Raspberry Pi ADS-B images so they can use the current V4L-compatible RTL-SDR library.
What sample rate should I use with RTL-SDR V4L?
Approximately 2.4 MSPS is a good general-purpose setting. SDRstore.eu lists approximately 2.56 MHz as stable bandwidth and up to 3.2 MHz maximum with dropped samples possible.
Can V4L receive HF?
Yes. It uses a built-in 28.8 MHz HF upconverter and covers approximately 500 kHz upward. With a correct driver, enter the desired HF frequency normally.
Do I need direct sampling for HF on V4L?
No. Do not enable direct sampling. V4L uses its built-in HF upconverter, unlike the Q-branch direct-sampling method commonly associated with RTL-SDR Blog V3.
What voltage is the V4L bias tee?
The integrated bias tee supplies approximately 4.5 V and is specified for up to approximately 180 mA continuous current.
Can the V4L bias tee power an ADS-B LNA?
Yes if the LNA is specifically designed to operate from approximately 4.5 V bias-tee power and stays within the current limit. Always verify the LNA specification before enabling bias power.
Why does my V4L appear in Windows but receive nothing?
The most likely cause is an old rtlsdr.dll that does not understand the V4L R828S tuner. Zadig and WinUSB alone are not enough; the SDR application also needs a V4L-compatible RTL-SDR library.
Why does Linux say my V4L is busy?
The Linux DVB television driver may have claimed the RTL2832U. Blacklist dvb_usb_rtl28xxu, install the correct udev rules and reboot.
Is RTL-SDR V4L better than V4?
Not universally. V4 has more extensive VHF/UHF front-end filtering. V4L has a simpler diplexed front end with lower filtering loss and therefore slightly improved sensitivity according to RTL-SDR Blog.
Is RTL-SDR V4L better than V3?
V4L is especially attractive for HF because it includes a built-in upconverter. V3 has a longer-established driver ecosystem and remains an excellent choice when maximum compatibility with older software is the priority.
No posts found
Write a review






We support all major card and digital payment options. More local methods are available and shown during checkout.
You enter into a binding sales contract once you have received an 'order confirmation and sales receipt' email from us, in line with our Sales & Delivery conditions. Therefore, sdrstore.eu has the right to cancel your order in the event of technical problems, delivery failure, Fair use policy and other similar situations.






Your payments are protected by advanced encryption and 3-D Secure authentication for safe online shopping.